-

- Forums
- Chatrooms
- Gallery
- Gameplay Videos
- Upload
- Articles
- Mod Reviews
- Shop SP: Games, Movies, Books

|
|
Neverwinter Nights allows you to customize your character in many ways. Adding your own custom portrait is one way for you to take character customization to a new level.
This document will describe the simple steps needed to:
| Step 1. Using an image editor of your choice that supports the Targa (.tga) format, create a new blank image 256 x 512 pixels in dimension. Example software includes Photoshop, Paint Shop Pro, and Irfanview. Only the top portion of the image is displayed in the game, so that the actual size of your portrait is 256 x 400 pixels. The bottom portion of the image is blank and unused. Areas of the image:
|
![]() You can also download the sample portrait I created, shown left. (This portrait is meant to be humorous, and should inspire you to do better!) You will need WinZip to unzip this portrait. If you view my sample portrait in your image editor, you will see it has the blank area described above.
You can also download the sample portrait I created, shown left. (This portrait is meant to be humorous, and should inspire you to do better!) You will need WinZip to unzip this portrait. If you view my sample portrait in your image editor, you will see it has the blank area described above.
Step 2. Create your custom portrait, whatever it may be, in the 'portrait' area. Remember, even though the total size of the canvas is 256 x 512 pixels, only use the top 256 x 400 pixels as diagramed above for the portrait itself.
Step 3. Now you need to create five versions of the portrait for the game to use. You have already created the largest version, so you can just resize it to make each of the four other smaller versions.
The dimensions of the five versions needed are:
Step 4. You must save the images as Targa (.tga) files, (selecting the '24 bits' and 'uncompressed' options of your software). The filenames for the five versions must follow this pattern:
Where the prefix "xxxxxxxxxxxxxxx" is a name you create, is 1 to 15 characters in length, and the same for all five versions.
The 'h', 'l', 'm' ,'s', and 't' that follows the prefix indicates the size of the image (Huge, Large, Medium, Small, and Tiny).
So for my sample portrait, I created these five images:
As you can see, my images all have the same prefix of "robinsample_" (since it is 12 characters in total, it follows the rule of being between 1 to 15 characters), and I also have each of the five versions - 'h', 'l', 'm' ,'s', and 't'.
Once you have either created your portrait, or downloaded one, you can use it in the game.
Step 1. Importing your custom portrait is easy to do. Simply copy the five versions of the portrait into your 'portraits' directory where you have installed Neverwinter Nights.
Step 2. Now you can select your portrait when you are creating a new character. Note that your custom portrait will be available for both male and female characters, unlike the original portraits in the game that are male/female specific.
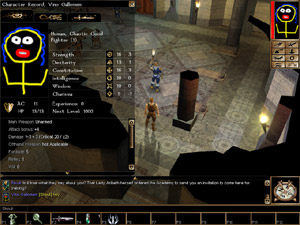
Above, you can see my custom portrait in the game.
When you are playing multiplayer and using a custom portrait, the portrait that people will see for you depends on if they have that same custom portrait in their 'portraits' directory as well. (It will look for portraits of the same filename.)
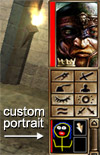 | 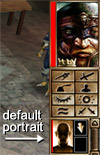 |
If they do, they will see your custom portrait. If they do not, then they will see you as the game's default portrait (Neverwinter Nights has 2 default portraits - one for male characters, one for female.)
So if you want your friends to see you with your new custom portait, simply e-mail the five versions to them, and ask them to copy the files into their 'portraits' directory.

