-

- Forums
- Chatrooms
- Gallery
- Gameplay Videos
- Upload
- Articles
- Mod Reviews
- Shop SP: Games, Movies, Books
CHAPTER 1 | CHAPTER 2 | CHAPTER 3 | CHAPTER 4 | CHAPTER 5 | CHAPTER 6 | CHAPTER 7 | CHAPTER 8 | CHAPTER 9 | CHAPTER 10 | |
Underdark | Kuo-Toan Caves | Illithid City | Beholder Caves | Ust Natha | Leaving the Underdark | |
BEHOLDER CAVES
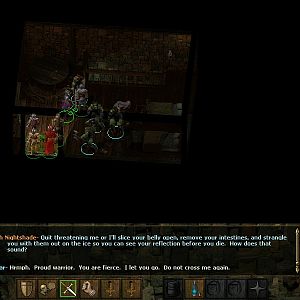
Beholder and Drow
I cast Haste before I enter the caves themselves. Once I enter, I bring down two Beholders standing at the entrance as quickly as I can. Haste is necessary because being at the entrance means no opportunity to summon Skeleton Warriors or set traps or anything like that.
Note that the Blade of the Equalizer is no longer with the two Beholders at the entrance. Indeed this dungeon gets ratcheted up significantly by SCS.
Note also that Keldorn lends his Girdle of Frost Giant Strength to Avastrian. Avastrian then equips the Shield of Balduran, but the -1 penalty to Strength becomes negligible when worn with the Girdle. Avastrian can thus hit hard while still wearing the Shield. However, since Beholders can use their Telekinesis power to take the Shield away once they clue in, I cannot rely solely on this setup. I have to mix it in with other tactics.
I rest up, set up my standard daily buffs, and have Anomen summon five Skeleton Warriors. I then make sure everybody's Hasted up. I then run north, and then east. I come upon several Drow ganging up on a lone Beholder. I go straight for the Beholder, and indeed I make sure I land the killing blow on it so that I can get the 14,000xp. After that I simply have everyone overwhelm the Drow.
A nearby cache holds a Battle Axe +2 and the Sling of Arvoreen +4 (sonic boom in area of effect, targets must save vs. spells for be stunned for three rounds). Anomen equips this in the interim.
Gauths and Mind Flayers
Now I rest up and do my set up again, including Skeleton Warriors. Anomen also casts Chaotic Commands on multiple party members. One thing to keep in mind is that it's easy to get into one fight, and then get other monsters after you when you travel just a little too far. I want to keep it to one fight at a time as much as possible.
Avastrian casts Haste. I then send him and Keldorn, along with a few Skeleton Warriors, towards the southwest corner. Note how I have them hug the left edge of the tunnel leading south. This is because I want to avoid fighting foes in the center of the caves for the time being.
Once I reach the southwest corner, I simply waste the Mind Flayers and Gauths that I find fighting each other.
Hive Mother
In the center of the caves are a Beholder, a pair of Gauths, and a Hive Mother. The Hive Mother can cast arcane spells, and can also keep herself protected with spell buffs. Indeed, she can string multiple Improved Mantles and the like together indefinitely to keep herself pretty much immune to any physical attacks.
So I rest up again, and have Anomen summon his Skeleton Warriors. Avastrian then guides the Skeleton Warriors west of the central hub. He sends the Skeleton Warriors in alone. It is important to have them approach from the west instead of the north. If they approach from the north, they'll go after the Hive Mother first, who will be immune to their attacks. By having them approach from the west, they will kill off the Beholder and the Gauths first.
Once they're dead, the Skeleton Warriors attack the Hive Mother next. They won't be able to damage her just yet. So I wait patiently until I see that they're starting to inflict damage on her. Once that happens, Avastrian charges in. He casts Haste on the Skeleton Warriors, and then he joins in the action. Together they wear down the Hive Mother.
The video concludes with Avastrian leading the Skeleton Warriors to kill off some Gauths towards the northeast corner of the caves.
Elder Orbs
Towards the southeast portion of the central hub will be several Gauths, Beholders, and an Elder Orb. The Orb can cast arcane spells in addition to the usual Beholder abilities. This also means that it can keep itself protected against physical attacks for a long time. Another thing you need to keep in mind is that it can also cast Imprisonment on a single character.
I engage in rather extensive preparations. First, Minsc scouts out their locations. In this way I am able to ascertain that the area has three chokepoints that the Beholders must get past at least one of if they are to reach me. Imoen thus sets 15 Skull Traps at each chokepoint, so that the Beholders are likely to trip them if they come after me. Once the Skull Traps are set, Anomen summons five Skeleton Warriors.
He then casts Fire Storm from just beyond the fog of war to get the attention of the Beholders closest to the centre chokepoint. One of the Beholders won't come out, but it soon dies outright on account of the Fire Storm. A Gauth managed to slip by while tripping only one Skull Trap, so Avastrian rushes in to finish it off.
The Beholders aren't biting, so I send Avastrian to skip by the central chokepoint while harmlessly setting off one of the Skull Traps. He thus gets the attention of another Beholder and an Elder Orb. The Beholder and another Gauth then trip the remaining Skull Traps at the central choke point to get themselves killed.
The Elder Orb soon arrives, so I retreat the party and send the Skeleton Warriors after it. The Elder Orb unleashes a Minor Spell Sequencer of Web + Stinking Cloud, but I'm nonplussed as I'm letting the Skeleton Warriors do all the work. They eventually wear down the Elder Orb, plus the remaining Beholder. After this, Avastrian (protected by his Cloak of Mirroring) goes about setting off the remaining Skull Traps.
The Elder Orb leaves behind its Eyestalk, a quest item that will become relevant later on, the Amulet of Spell Warding (+2 to save vs. spells), and the Blade of the Equalizer. Imoen equips the Amulet of Spell Warding in the interim.
Meanwhile there's another cave towards the southeast corner. It will have another Beholder and another Elder Orb. I rest up. Imoen sets 15 Skull Traps near its entrance. Anomen summons five Skeleton Warriors, and then casts Fire Storm from outside the Fog of War. This encourages the Beholder to kill itself on the Skull Traps. But the Elder Orb hasn't taken any damage. So Avastrian rushes in and sets off the remaining Skull Traps to get the Elder Orb's attention. He then regroups with the party while I send the Skeleton Warriors ahead after the oncoming Elder Orb. And again the Skeleton Warriors eventually manage to wear down the Elder Orb.
My next destination is the Drow city of Ust Natha.