-

- Forums
- Chatrooms
- Gallery
- Gameplay Videos
- Upload
- Articles
- Mod Reviews
- Shop SP: Games, Movies, Books
|
|
Items in Malefia | Freeing the Gods | Tarjan |
Freeing the Gods
Statue of Ferofist
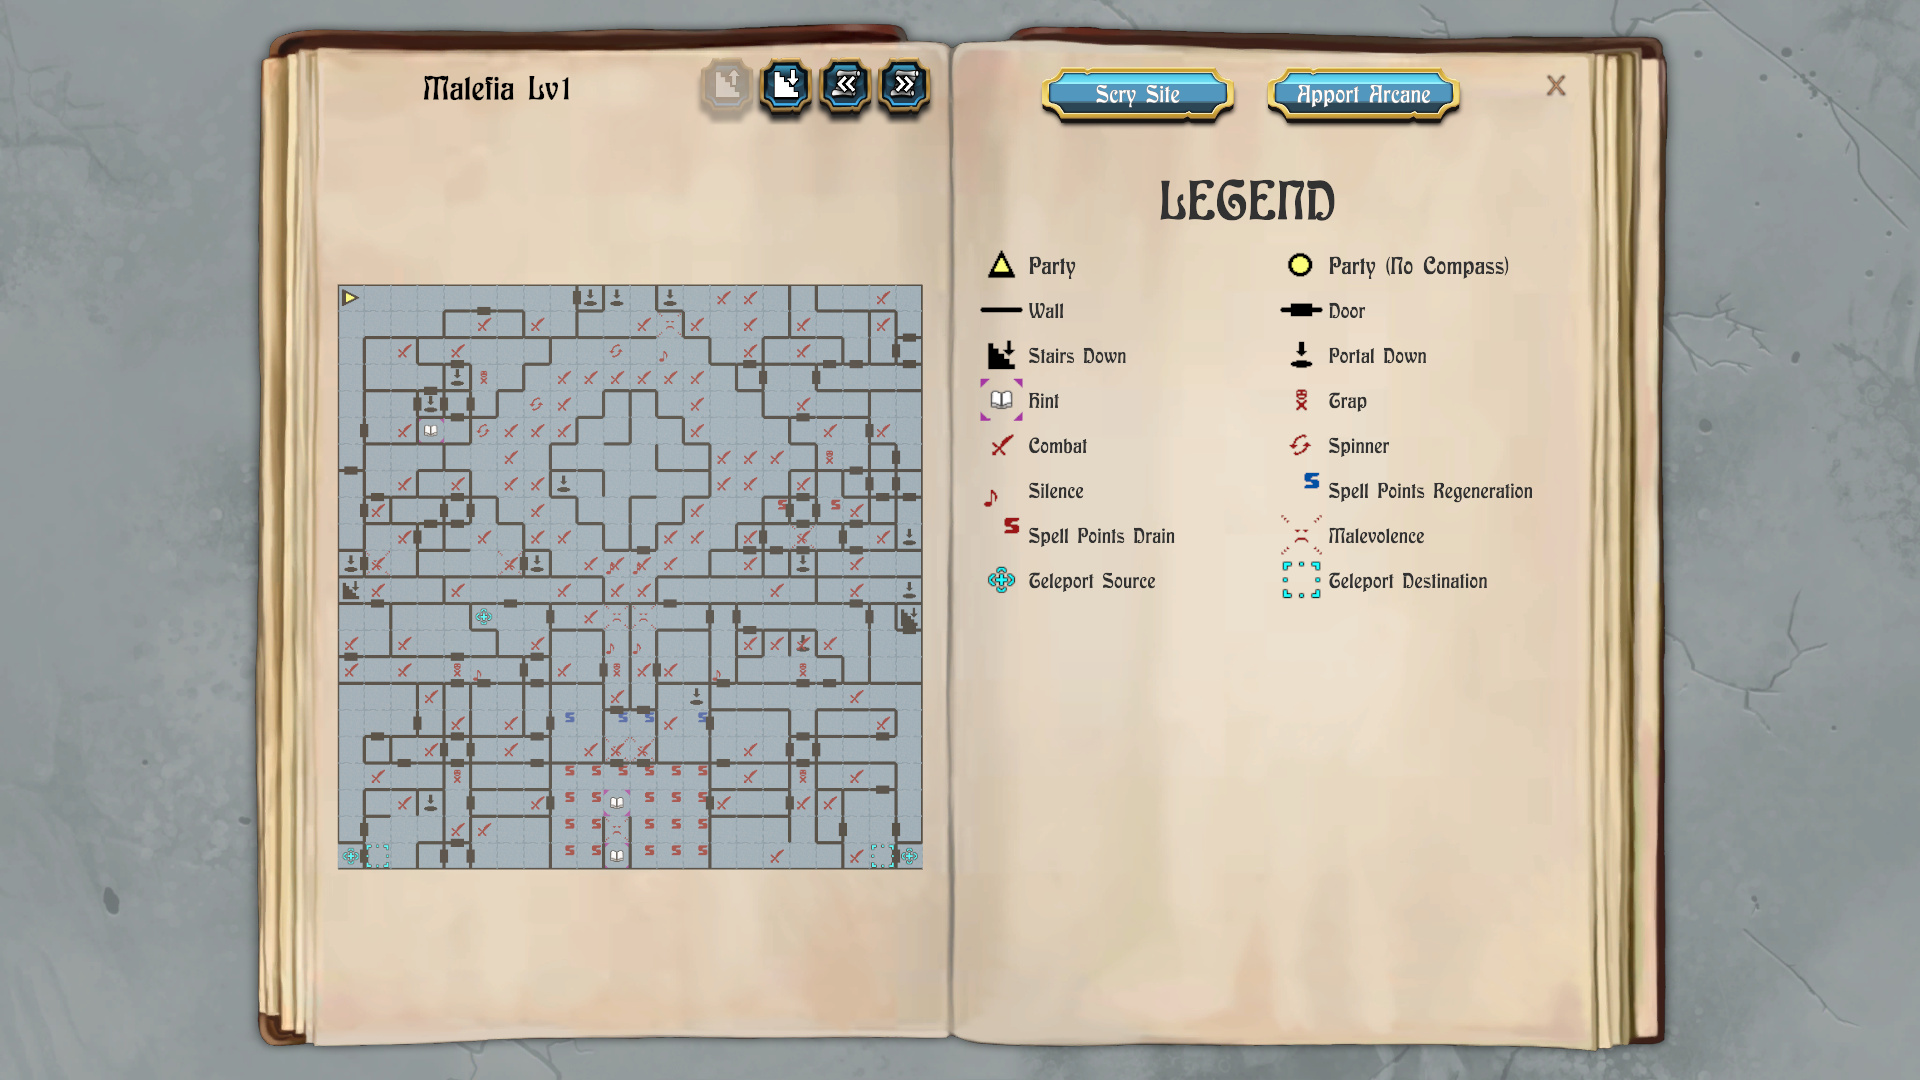
I start off at 0N 10E on the map of the first level of Malefia. I have Ariel keep Sir Robin's Tune active. The reason is that I'll run away anytime I run into random monsters. There's no point in fighting anymore unless I really have to. Any xp I gain I cannot use towards level advancement after the end of the game, and there wouldn't be much point anyway even if I could.
Also, I have Zarathos cast Earth Ward anytime I enter a level again, just to be sure to get rid of any traps as I'm going along.
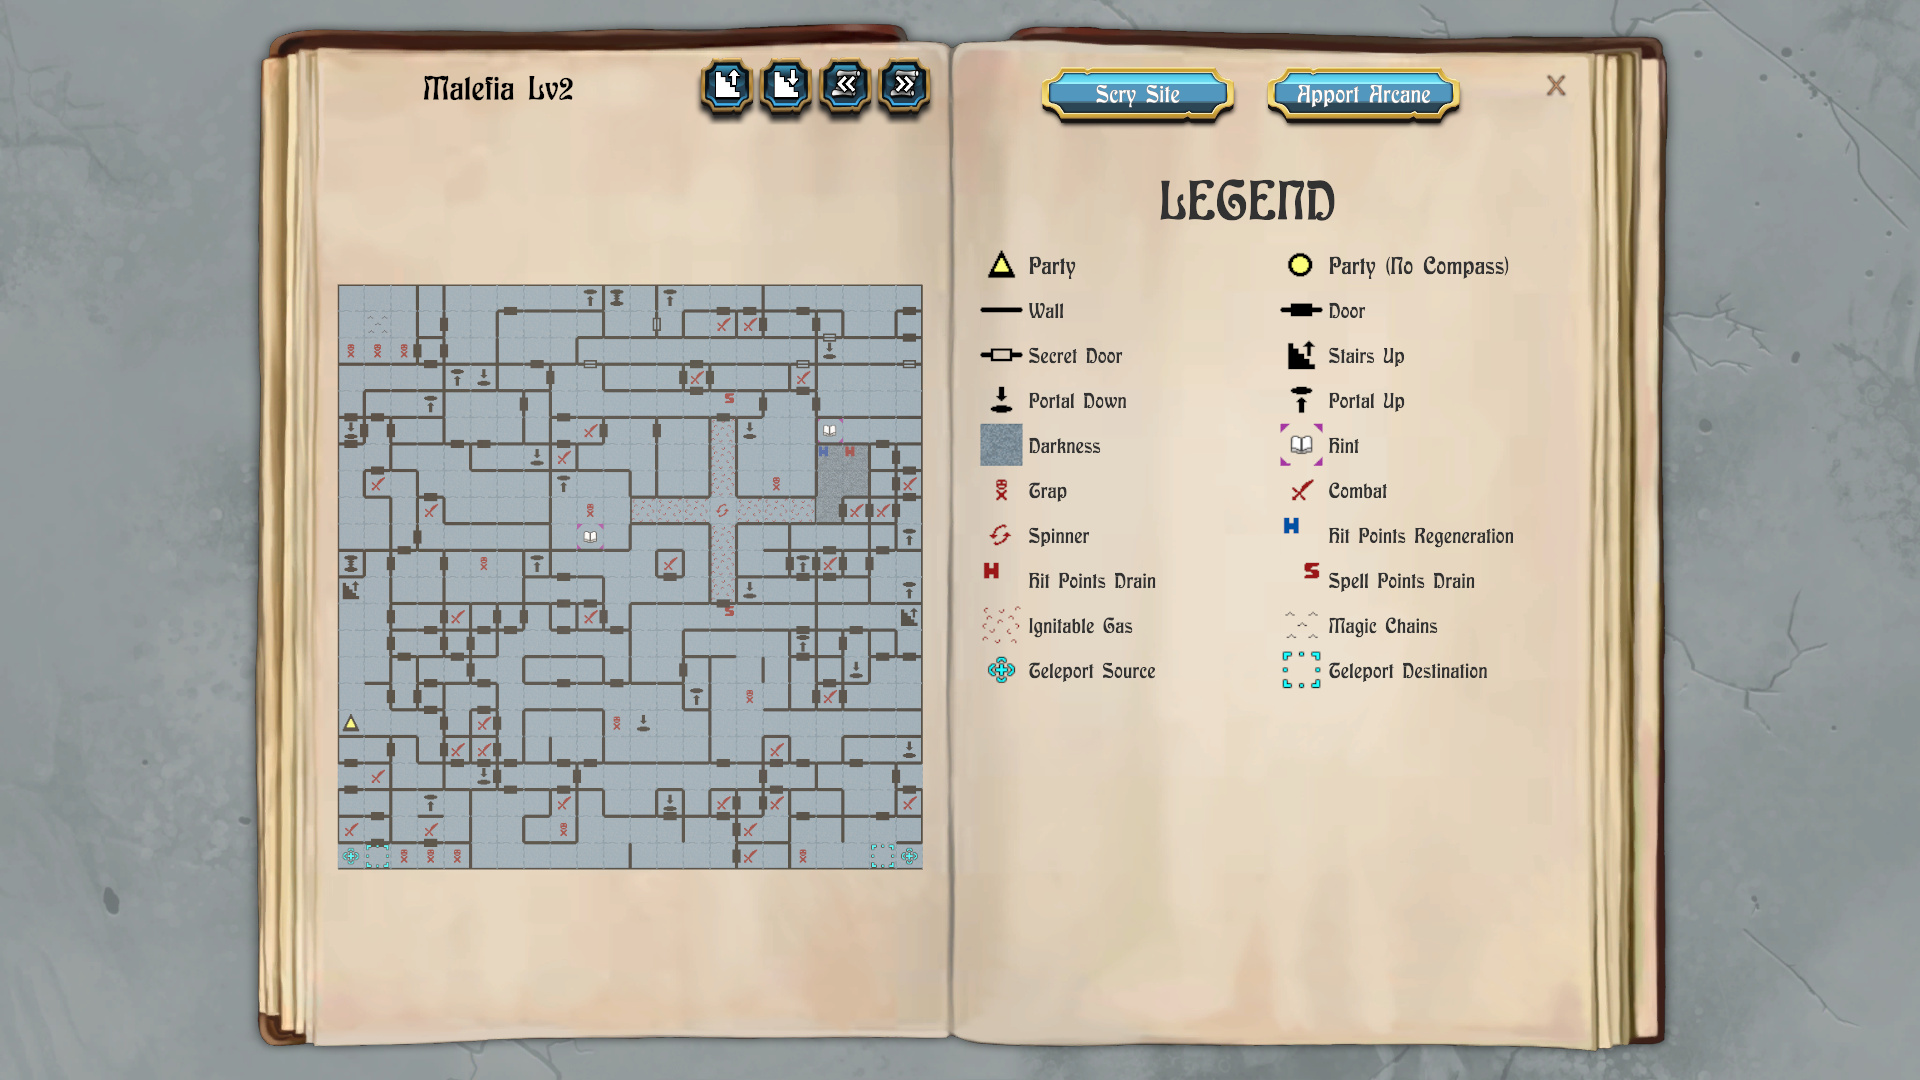
I go N N W W W W W W N NW W S W W S S E S and W. The teleporter at 0N 0E takes me to 0N 20E on the map of the second level.
I go N N N W N E and E. I go down the portal at 4N 21E.
I go W N W W S S E S E and E. At 2N 21E on the map of the third level is the spirit of Ferofist, entrapped within a statue of black ice. I have Gallard use Ferofist's Helm, which frees Ferofist's spirit. His voice tells me, "He opens the gates of Hell." The objective becomes clear, to free the spirits of the rest of the dead Gods from their imprisonment.
I go back the way I came, and step onto the teleporter at 0N 21E on the map of the second level. It brings me to 0N 1E on the map of the first level.
Statue of Alliria
Now I go N W N N E E N E E N N N W W W W N E N N and W. I go down the stairs at 10N 0E on the map of the first level.
Now I go E N E N N N W N N N E and E. I go up the portal at 17N 3E on the map of the second level, and then go up it.
I go E S and W until I reach the statue imprisoning Alliria at 16N 3E on the map of the first level. I have Cassandra use the Belt of Alliria to melt the statue away. Alliria's voice tells me, "Legions horrid and vast." I go back to the portal and return to the second level.
Statue of Valarian
From the portal at 17N 3E on the map of the second level, I go W W S W N N E E E N E E N N E S S E S E E N E E E E E E E E S S E E E N N N N W W W W S W W N W W and W. I go up the portal at 21N 12E.
Now I go E S E S E S E S E S E S E S E E S and S, until I reach and descend the portal at 12N 21E on the map of the first level.
I go N N N W N W and W until I reach 16N 18E on the map of the second level. I have found the statue imprisoning Valarian. I use Valarian's Bow from the party inventory to melt the statue and set his spirit free. His voice says, "He cannot be defeated by what he can see." The game's title includes Thief of Fate, which is meant to convey a strong canonical preference for how to kill Tarjan once and for all.
I retrace my steps so that I go up the portal at 12N 21E on the second level.
I go N N W W N N W W N N W W N W N W N W. I next go down the portal at 21N 12E on the first level.
Statue of Lanatir
I go S W W and N. At 21N 9E is a portal that can either go down to the third level or go up to the first level. I go back up to the first level.
Now I go S E E S S S E S E S S S W S W S W N N E N W W S W N and W. There are at least a couple of silent squares along the way, so I have Ariel put her Sir Robin's Tune back up. I also go down the portal at 14N 8E on the map of the first level.
I next go S S and E. At 12N 9E is a statue that imprisons the spirit of Lanatir. Zarathos uses the Sphere of Lanatir to set him free. Lanatir's voice says, "To oppose the Usurper's usurpers."
*NOTE* There is a one-way wall to the east that prevents me from coming here from the crossroads part of this level. I could only come to this statue from the diamond-shaped room on the first level.
Statue of Sceadu
I go E N E E E E N N N N E E S and W. I go down the portal at 16N 15E on the map of the second level.
Now I go N E E S E E S E N N N W N W N N W S W and W. A statue imprisoning the spirit of Sceadu is at 20N 15E on the map of the third level. Cassandra uses Sceadu's Cloak to set his spirit free. His voice says, "Hold his allies at bay."
Statue of Werra
Now I go E E N W and N to loop around to the southern edge of the third level.
I continue N W W W W W N and E. I go up the portal at 2N 12E to go back to the second level.
I next go S W W W S W W W N N N N N N E E E E E and S. I go down the portal at 5N 11E to return to the third level.
Zarathos casts Earth Ward to get rid of several traps in the near vicinity. I go S E and N to reach the statue imprisoning Werra's spirit at 5N 12E. Gallard uses Werra's Shield to set his spirit free. His voice says, "It can be stolen from the jaws of defeat. The way is open for the next generation."
High Priestess
I am ready to proceed to the climax now that all six of Tarjan's enemies among the Gods of Old have been freed. Waiting for me at 8N 11E will be a High Priestess, 20 Black Paladins, 3 Rock Demons and 4 Pit Demons. Be careful of the Rock Demons, since they're fully capable of Stoning even characters with -50 AC with their melee attacks.
Lord Stygar takes out the High Priestess right away with his Strifespear. A double shot of NUKE from both Talia and Mordred suffices to wipe out most of the Black Paladins and all of the Rock Demons. Cassandra uses her Red's Stiletto to prevent the surviving Paladins from doing anything.
Gallard can't connect on the Pit Demons with his Sword of Zar, so Zarathos uses an Earth Maw spell to swallow them away. I have very little trouble mopping up on the remaining Black Paladins.
Redbeard
I go now to 11N 10E, where I confront 10 Vortexes, 20 Tarjan Warriors, 2 Black Dragons and Redbeard. Redbeard is a powerful spellcaster. The Black Dragons cannot be hit by missile weapons. The Tarjan Warriors boast a LOT of Hit Points, and can hit for a lot of damage (500+) themselves. The Vortexes are completely immune to any magic, and their melee attacks will drain Spell Points from their targets, which can make them a real nuisance for Zarathos.
Ariel starts with a Spell Song. That in turn paves the way for Talia and Mordred to wear down the Warriors, the Dragons, and Redbeard with double-shots of NUKE round after round.
The Strifespear's Far Death power won't work on the Vortexes. But it still causes instant death if used in a melee attack, just with a shorter range. Lord Stygar, Zarathos, Ariel (after the first round), Gallard and Cassandra (after Hiding) work together to take out the Vortexes as quickly as possible with instant-death melee attacks. My strategy eventually succeeds just as planned.
The portal at 11N 11E brings me to my final confrontation with Tarjan, but only after having freed the spirits of the Gods of Old.