-

- Forums
- Chatrooms
- Gallery
- Gameplay Videos
- Upload
- Articles
- Mod Reviews
- Shop SP: Games, Movies, Books
CHAPTER 1 | CHAPTER 2 | CHAPTER 3 | CHAPTER 4 | CHAPTER 5 | CHAPTER 6 | CHAPTER 7 | CHAPTER 8 | CHAPTER 9 | CHAPTER 10 | |
Brynnlaw | Spellhold | Asylum Dungeon - Level 1 | Asylum Dungeon - Level 2 | Asylum Dungeon - Level 3 | Asylum Tests | Escape from Spellhold | City of Caverns | |
ESCAPE FROM SPELLHOLD
Asylum Inmates
Now I go down the stairs. Saemon Havarian pops by and suggests that my survival depends on convincing the Asylum inmates to join me against Irenicus. He's right. If I try to go through the nearest door and directly to Irenicus, he'll kill me then and there and the game ends.
Instead I round out the hallway to the east, and then north. I don't bother with the portal to the Underdark. I score some magical ammunition along the way, including a few Arrows of Dispelling (which are treated as non-magical and thus can be used on a Mage using Protection from Magical Weapons). For interest's sake I also peruse the First Journal of Jon Irenicus.
I continue west and then up the next set of stairs. I want to save my resources for Irenicus so I give Lonk the Sane his 2,000gp to release the inmates. It won't take much to convince the lot of them to help me against Irenicus.
Irenicus Flees
Wanev teleports the lot of us right in front of Irenicus. Irenicus will start off with a LOT of spell protections in place. These include Spell Immunity: Abjuration, so Keldorn's Dispel Magic won't work. If given enough time he can wreak a lot of havoc with his offensive spells. I recall one occasion where he casted Time Stop, and then blew me away outright with a pair of Comet spells stringed together. Also, the Arrows of Dispelling won't work because his protections include Improved Mantle instead of Protection against Magical Weapons.
However, he spends the first round summoning cloned members of my party. Unlike the practically naked pushover clones in vanilla BG2, the SCS Clones will have the same equipment and abilities as my party members.
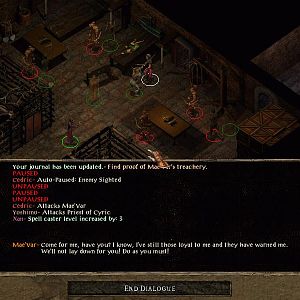
While this ups the ante, it also buys me the precious little time I need. Jaheira waits until the clones appear, and then aims her Insect Plague at the one closest to Irenicus. It spreads to Irenicus and the other Clones, preventing them from casting spells. Avastrian and Imoen throw in their Chaos and Slow combo for good measure. I then wipe out the Clones one by one, and then eventually take down Irenicus. He flees, but not before unleashing magical energies that kill the Asylum inmates.
Yoshimo's Heart
Now Yoshimo and several Murderers attack me. SCS will have them repeatedly go invisible to attempt backstabs, but Keldorn minimizes the danger with True Seeing.
Once the battle is done, Avastrian places Yoshimo's Heart into his Bag of Holding. It will be used to complete a quest much later on.
It is at this point that I can now rest without Avastrian turning into the Slayer and attacking his comrades. When I do rest, Avastrian has another nightmare with Bhaal (pretending to be Imoen) trying to tempt him to embrace his heritage. When the party wakes, Avastrian can now turn into the Slayer at will. It is very powerful, but it invokes a -2 penalty to reputation each time it's used. The Bhaalspawn protagonist can also take damage if remaining in the form for too long.
Irenicus' Plans
Now I go back to the upper level of the Asylum. I run into Saemon Havarian, and tentatively accept his offer of assistance. He teleports me outside of the Asylum.
Except I'm not quite done just yet. I head back towards the front door of the Asylum, and kill an Air Elemental along the way. I then kill a Stone Golem as soon as I step through the front door. There will be a couple of rooms to the north with chests in them. Among the loot is:
The party then returns to Brynnlaw, selling off their excess loot. They also make a stop off at the Temple of Umberlee. I buy a few items here, because this will be my last chance for it. The items I bought were:
Sea Gate Horn
Now I rendezvous with Saemon in the Vulgar Monkey. The plan is to get the Pirate Horn from Lady Cayia's home so that we can escape by ship.
I rest up until night and then head over to Cayia's home, which is westwards on the upper level of Brynnlaw. Cayia inevitably wakens and summons her guards, which aren't much trouble. I loot the Horn and a Rogue Stone.
I then wait for a fight to conclude between two pirates west of Cayia's home. I then loot a couple of potions from the dead pirate after the fight concludes.
Now I head towards the east side of the docks.
Desharik
Saemon has the ship ready. Only Desharik arrives along with several of his Pirate thugs. A fight ensues after he kills Lady Desharik. This fight isn't difficult, and I go for Desharik first. He leaves behind two Scimitars +1, and a Studded Leather Armor +1. Anomen shows the optimal situation for when to cast the Hold Person spell, when they are tightly bunched together.
Saemon gives me the blade for the Silver Sword, and we're away.
Githyanki Board the Ship
Well, now the ship gets boarded by a hostile force of Githyanki. I conduct this fight not so much with the expectation of fighting it to a conclusion, but simply to survive long enough for Sahuagin raiders to board the ship as well. Jaheira hits a nearby Githyanki with an Insect Plague in order to prevent them from casting spells, and minimize the harm to the party.
When the Sahuagin do board, it means I'll get taken to their City of Caverns.