-

- Forums
- Chatrooms
- Gallery
- Gameplay Videos
- Upload
- Articles
- Mod Reviews
- Shop SP: Games, Movies, Books
|
|
Gelidia | Ice Keep | Black Tower | White Tower | Grey Tower | Ice Dungeon |
Grey Tower
2nd Staff of Mangar
I win fights against random monsters at 8N 10E, 8N 11E, 6N 10E, 3N 10E and 3N 11E. I go to 4N 11E, face west and use Trap Zap on the trap at 4N 9E.
I next win fights against random monsters at 3N 9E, 5N 9E, 6N 8E, 8N 8E, 8N 9E and 9N 9E.
I get a second Staff of Mangar after the last fight. I have Mordred equip it.
Opalescent Hulking Creature
I win fights against random monsters in an extended sequence of 2N 9E, 0N 8E, 1N 9E, 1N 10E, 2N 7E, 0N 7E, 0N 6E, 2N 5E, 1N 4E, 0N 5E, 5N 3E, 5N 2E, 7N 3E, 9N 3E, 2N 2E, 0N 2E, 4N 1E, 3N 2E, 5N 0E, 4N 0E, 2N 6E, 7N 0E, 8N 1E and 8N 2E.
I go to the square at 9N 2E and remain there until Talia and Mordred have their Spell Points fully recharged.
Now I go to 9N 0E. There's an opalescent hulking creature in my way. Mordred casts the spells Instant Wolf, Wind Hero, Force Focus and Invisibility to dissipate the creature and reveal the stairs to the Grey Tower.
1st Diamond Bracers
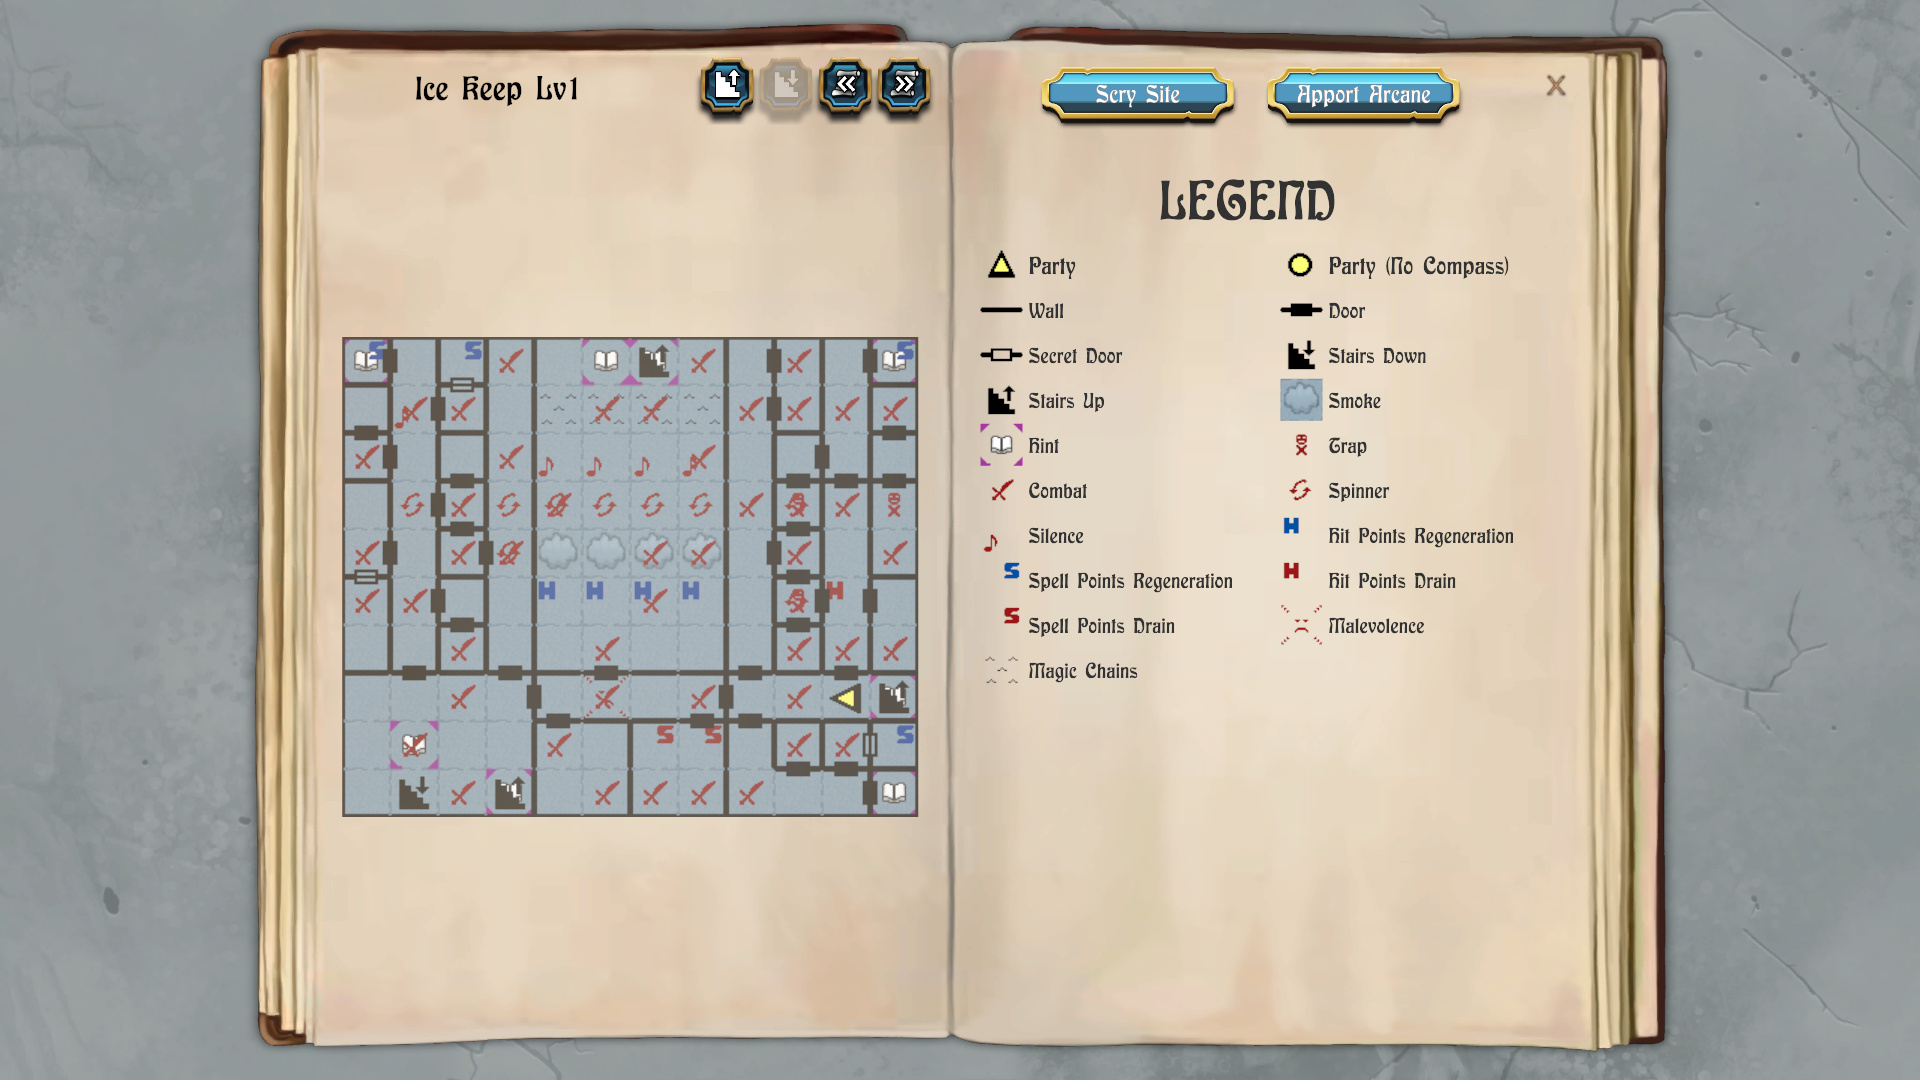
The levels of the Grey Tower are characterized by one-way walls that close in behind you, and the first one is no exception.
I begin by casting Trap Zap to get rid of two traps west of the stairs, which are at 0N 4E. I then win fights against random monsters at 0N 3E and 0N 1E.
The western edge of the level has a couple of dark squares. I go through them, winning fights against random monsters at 2N 0E and 4N 0E. Mordred uses the Eternal Torch afterwards.
I win fights against random monsters at 4N 2E and 4N 4E. I get a pair of Diamond Bracers after the last fight. Talia equips them for a 2 point improvement to AC.
I win another fight against random monsters at 2N 4E. The walls close in behind me, so I have to go to the stairs at the southeast corner, and make the same trip along the south and western edges of the level.
I go to 4N 2E, and then step south through a secret door. I win fights against random monsters at 3N 2E, 2N 3E and 1N 2E. And I again go south, and then repeat the trip along with the south and west edges of the level.
I go back through the secret door, and win fights against random monsters at 2N 1E and 1N 2E. The stairs to the next level are at 2N 2E.
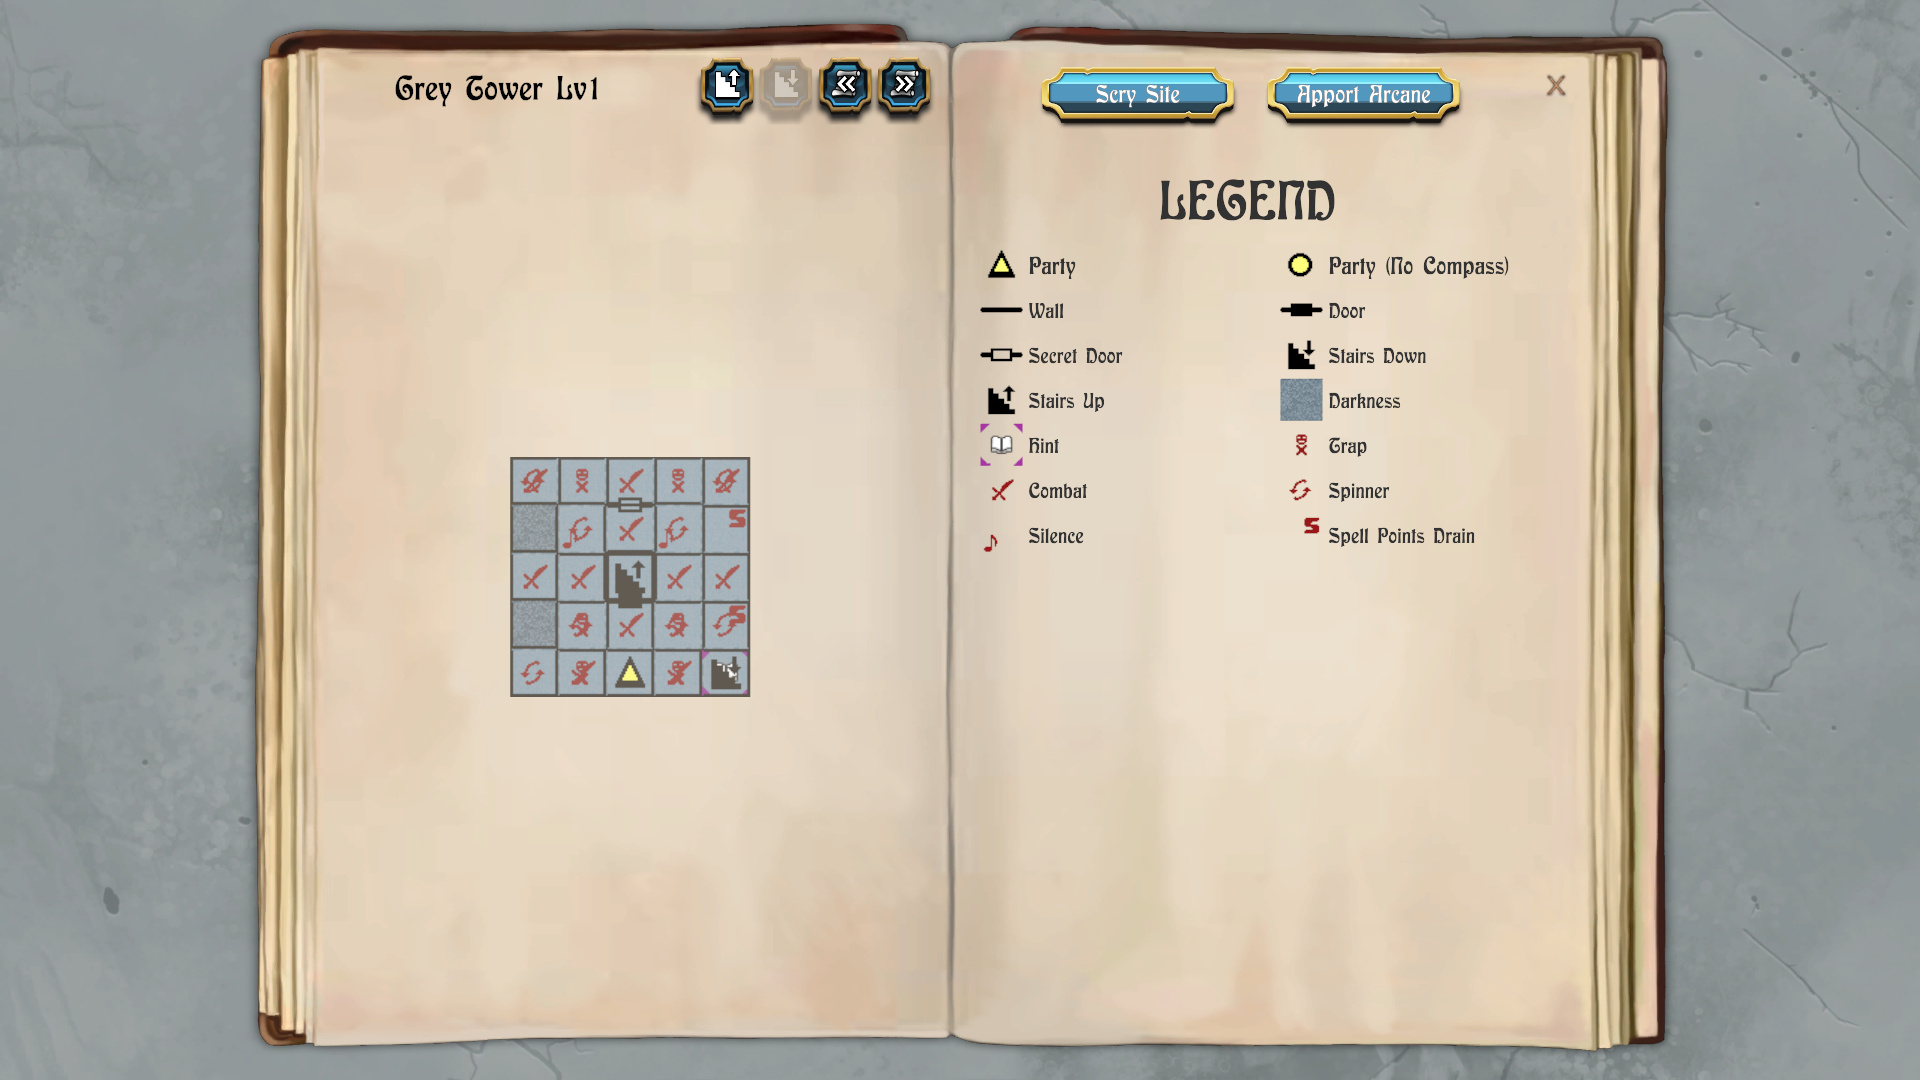
Grey Tower, Second Level
I go south and win a fight against random monsters at 0N 2E. I continue south and loop around to the north edge of the level.
I continue with fights against random monsters at 3N 0E, 2N 1E and 0N 0E. I go west and loop around to the east edge of the level.
I win another couple of fights against random monsters at 2N 3E and 3N 4E. I go east and loop back around to the west edge of the map.
I win another fight against random monsters at 4N 1E. The stairs to the next level are at 4N 0E.
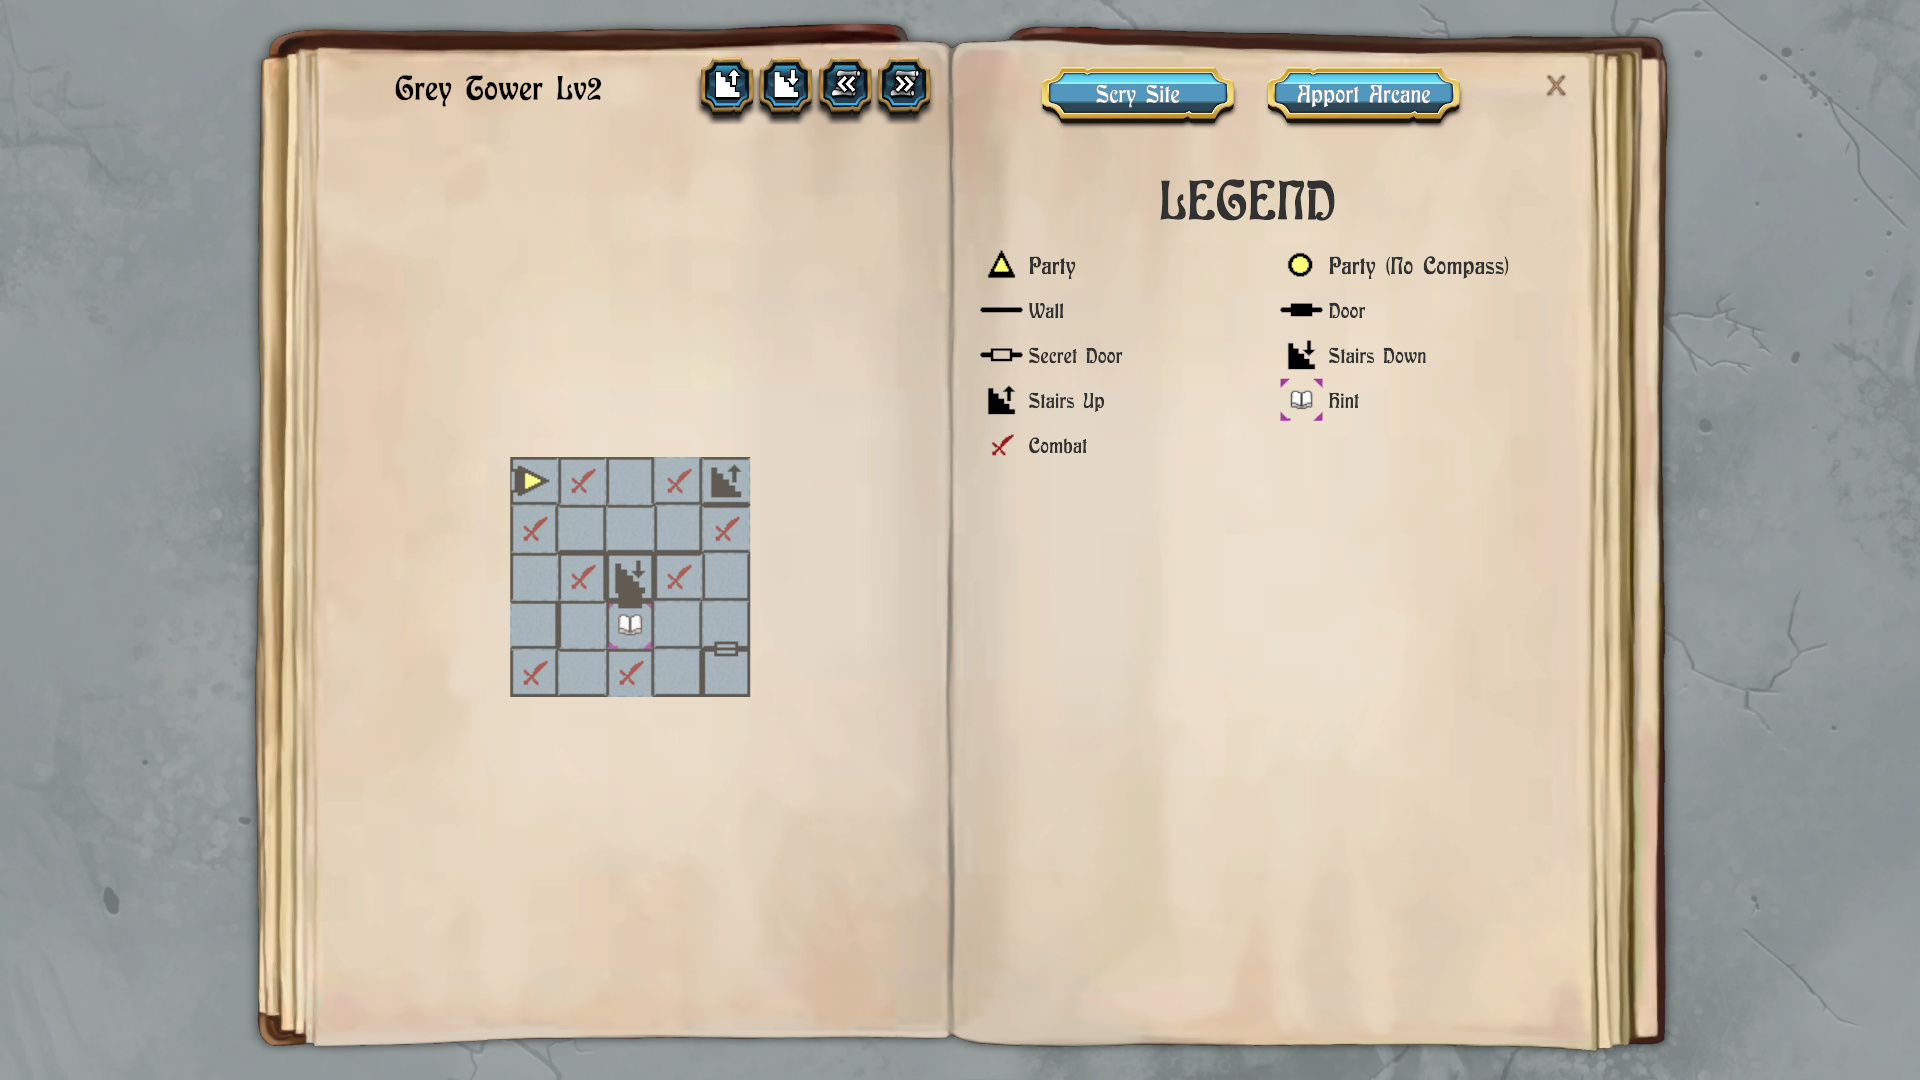
2nd Diamond Bracers
I begin by casting Trap Zap while facing west in order to get rid of a couple of traps. I thereafter win fights against random monsters at 4N 2E, 4N 0E, 3N 0E, 2N 0E and 1N 0E.
I get a second pair of Diamond Bracers after one of the fights. Mordred equips it for a 1 point improvement to AC.
The stairs to the next level are at 0N 0E. But I go one square east past them, face north, and then cast Trap Zap to get rid of the trap at 2N 1E.
I win the fights at 0N 2E, 1N 2E, 2N 2E and 3N 3E, although I can't do them in a straight line like I did the previous series of fights. I have to do a little making my way around one-way walls and such to get all of these fights. *Note* I get a second Ring of Accuracy during one of these fights. I decide to keep that one too, just in case it figures into my late game plans as well as the first Ring of Accuracy. And it turns out that's what I did.
It is afterwards that I make my way to the stairs at 0N 0E and go up to the fourth level.
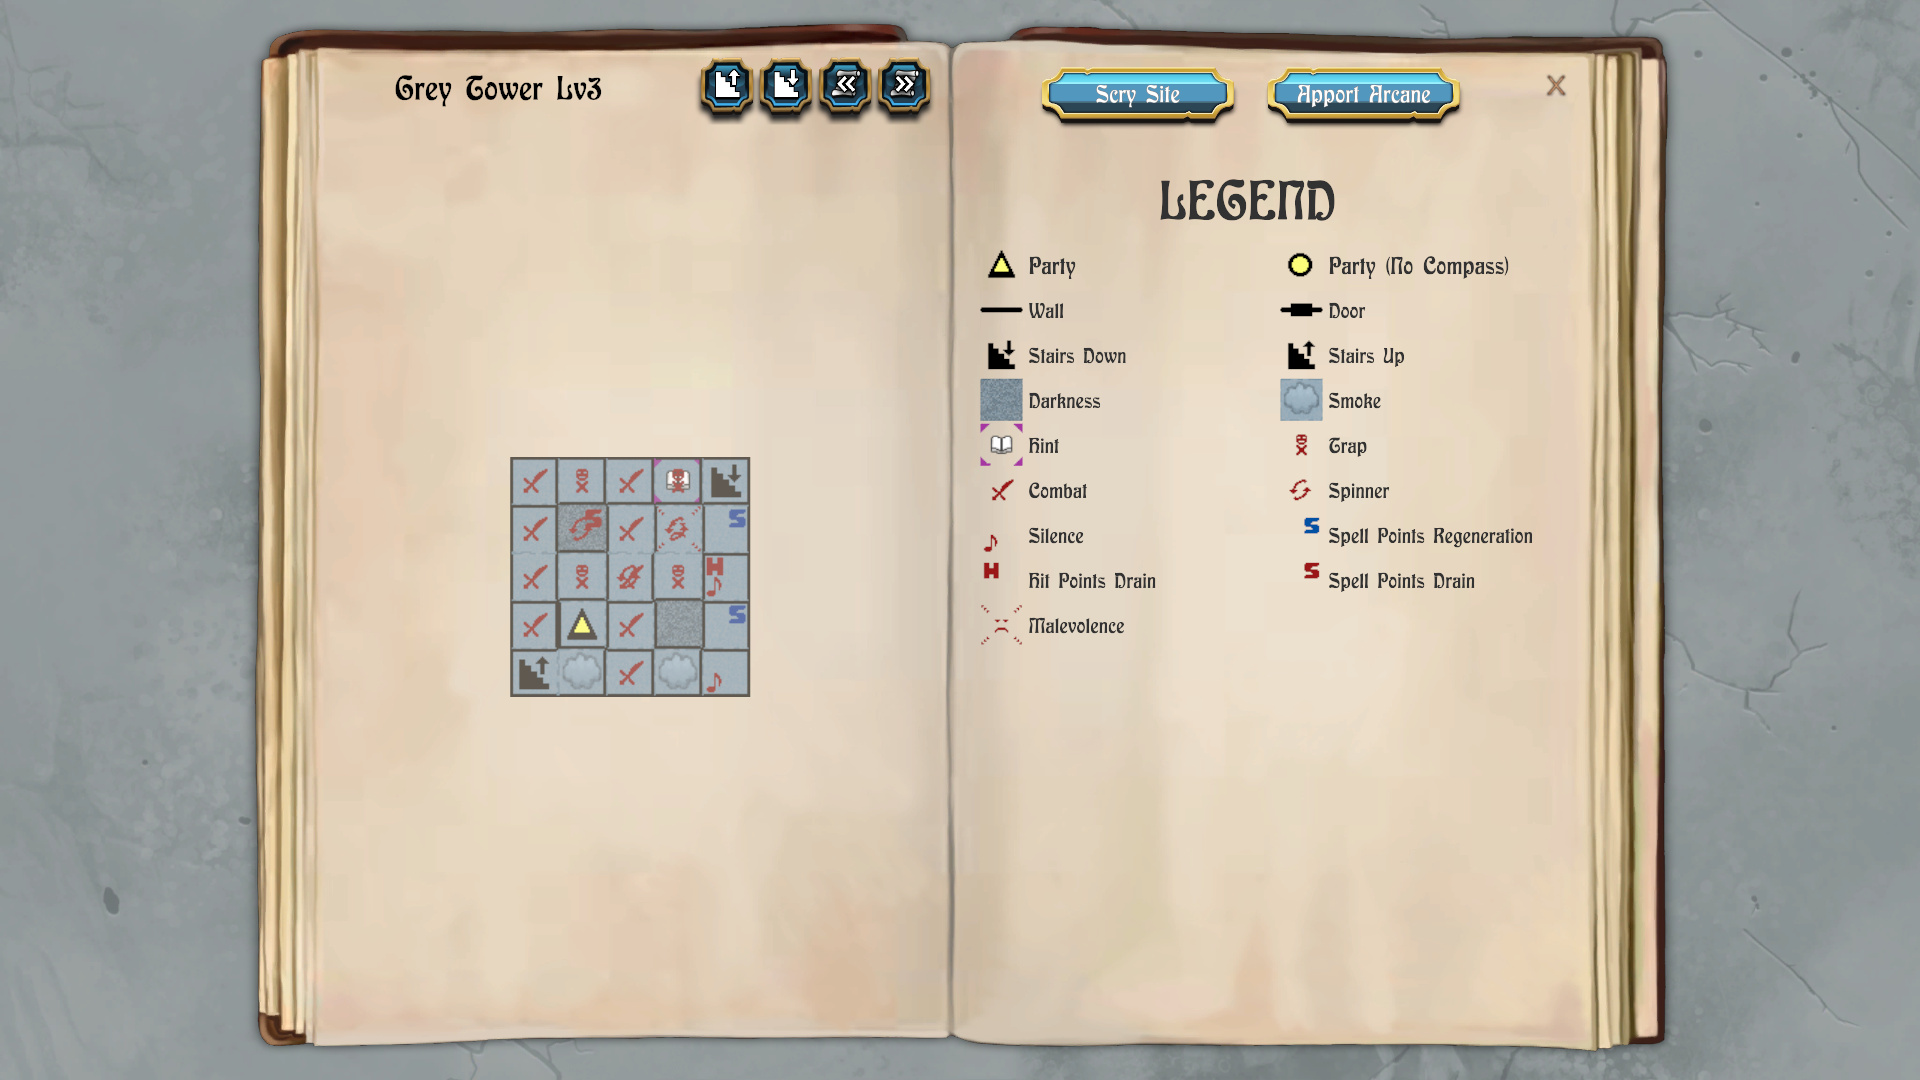
Grey Wizards
I start off by going E N E and N to win a fight against random monsters at 2N 2E.
I win a couple more fights against random monsters at 2N 3E and 4N 4E. I go east to loop around to 4N 0E to win another fight against random monsters.
I win another couple of fights against random monsters at 2N 1E and 2N 0E. I go west to loop around to the east edge of the level, and win another fight against random monsters at 2N 4E.
I go 0N 3E, and remain on that square until Talia and Mordred have their Spell Points fully recharged. I next win another fight against random monsters at 0N 4E.
Now I cast Apport Arcane with coordinates 0 -2 0 to reach 0N 2E. I go south two squares to reach the Grey Wizards. I spend the first round buffing up with Lucklaran from Ariel, Luck from Talia and Anti-Magic from Mordred. It becomes a matter of advancing on them one round at a time, and then hacking them down after I've closed the distance. I get a Smokey Lens in my inventory afterwards.
I cast Apport Arcane again, but with coordinates 2 1 0. I sit on the square again until Talia and Mordred are back up to full Spell Points. After that, I go two squares east and go back down the stairs.
*Note* I do all the fights over again on the three lower levels as I make my way back down to the Tower, but I do not show any video for that.
The Ice Dungeon is my next destination.