-

- Forums
- Chatrooms
- Gallery
- Gameplay Videos
- Upload
- Articles
- Mod Reviews
- Shop SP: Games, Movies, Books
|
|
| Bard's Tale 3 Remastered Online Walkthrough by David Milward |
Kinestia | Private Quarter | Barracks | Workshop | Urmech's Lair |
Urmech's Lair
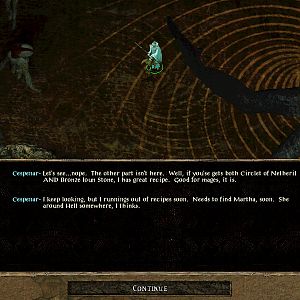
Urmech's Paradise
I start off at 1N 7E. I win fights against random monsters at 1N 13E, 1N
11E, 1N 9E, 1N 5E, 1N 3E, 1N 1E and 3N 1E. I continue to the north side,
forcing my way through stuck squares as I go along.
I go to 14N 7E, and go south through the door. The large room in the
center is filled with smoke squares. I win fights against random monsters
at 11N 8E, 12N 6E, 12N 3E, 10N 2E, 7N 4E, 1N 2E, 3N 4E, 8N 12E and 7N 10E.
I make my way to the cross-shaped room in the middle of the level, and win
fights against random monsters at 8N 6E, 8N 7E, 8N 8E, 9N 7E and 7N 7E.
I leave the cross-shaped room and win two more fights against random
monsters at 6N 7E and 4N 7E. The stairs to the Viscuous Plane are at 3N
7E.
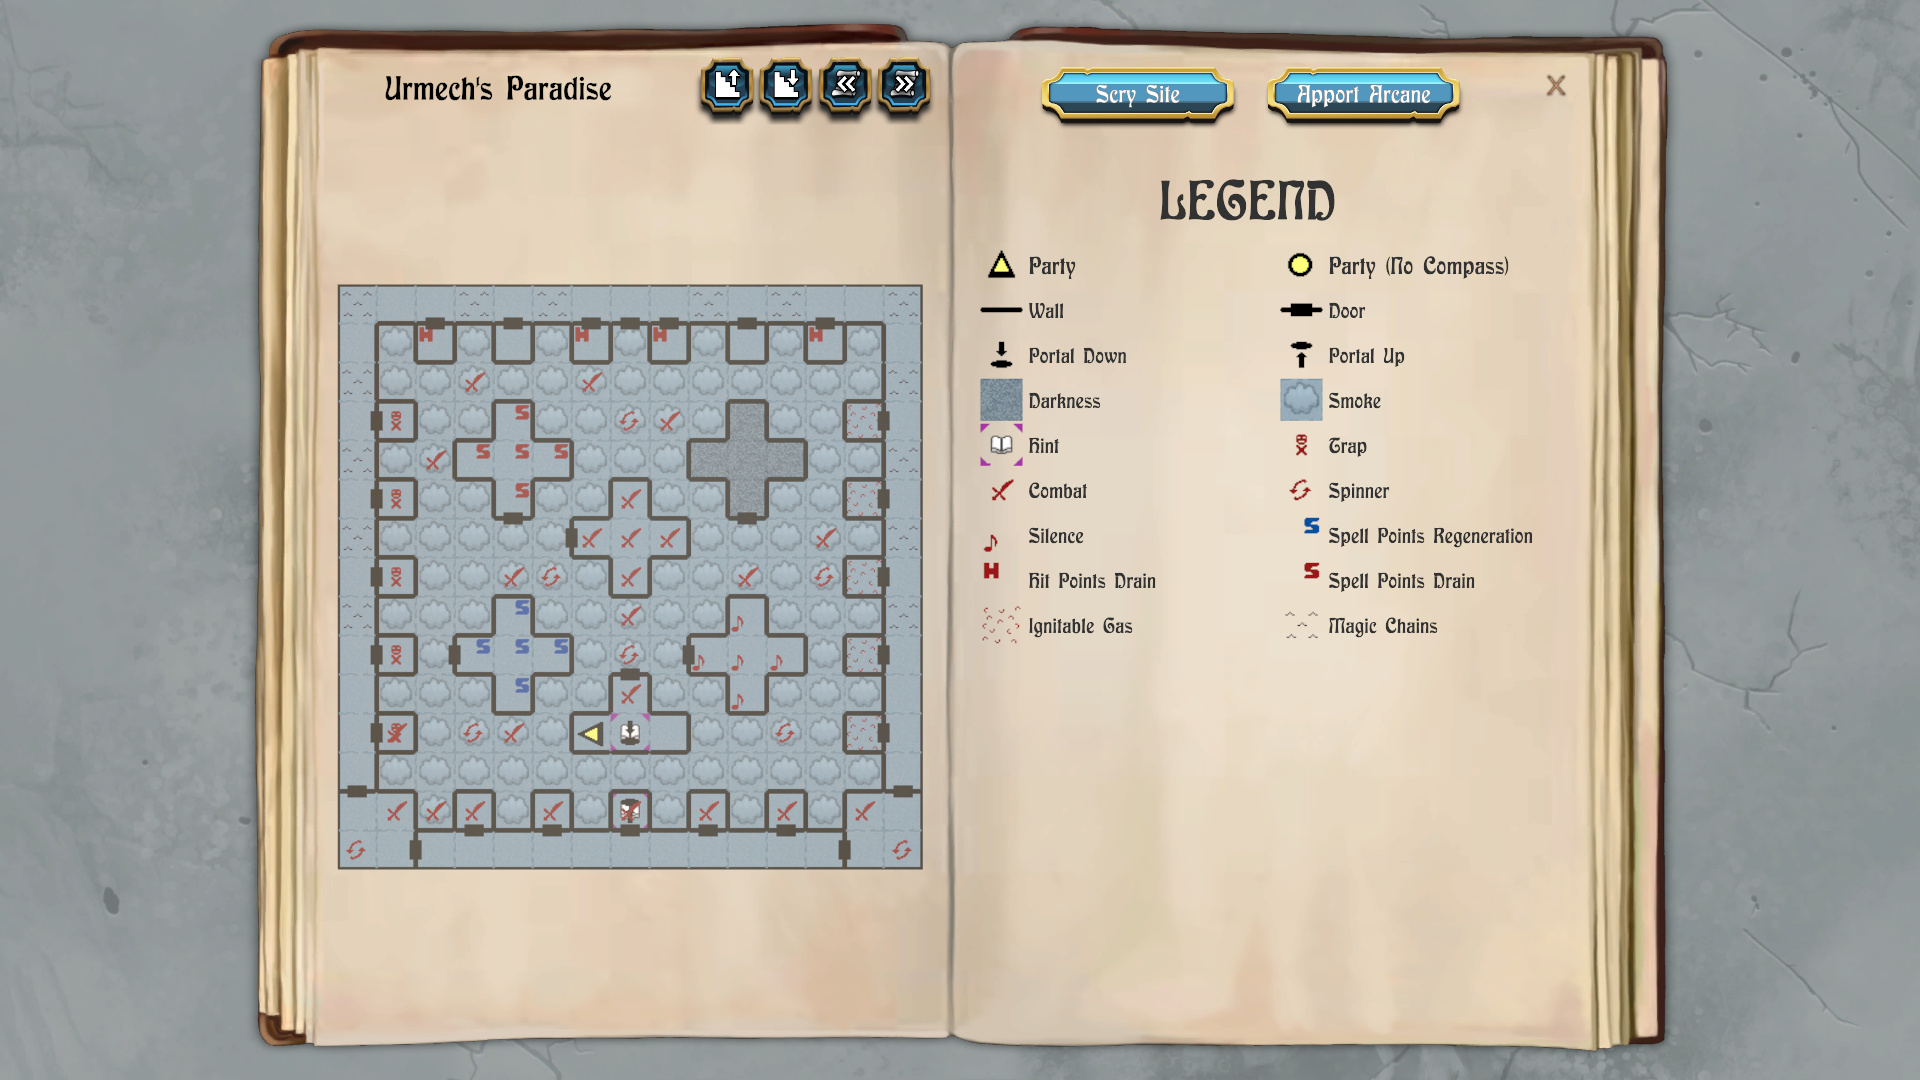
Viscous Plane
I start off at 8N 7E. The level itself is submerged, so I have to
maintain a Gilles Gills spell to avoid the steady loss of Hit Points.
I win fights against random monsters at 6N 5E, 6N 1E, 4N 6E, 6N 6E, 6N 9E,
4N 11E and 3N 8E. I rest on the square at 5N 10E until Talia and Mordred
have fully recharged their Spell Points.
I win more fights against random monsters at 6N 12E, 8N 12E, 11N 14E, 3N
14E, 1N 12E, 3N 12E, 0N 6E, 4N 3E and 0N 2E. The way to the Sanctum is at
0N 0E.
1st Diamond Suit and Eelskin Tunic
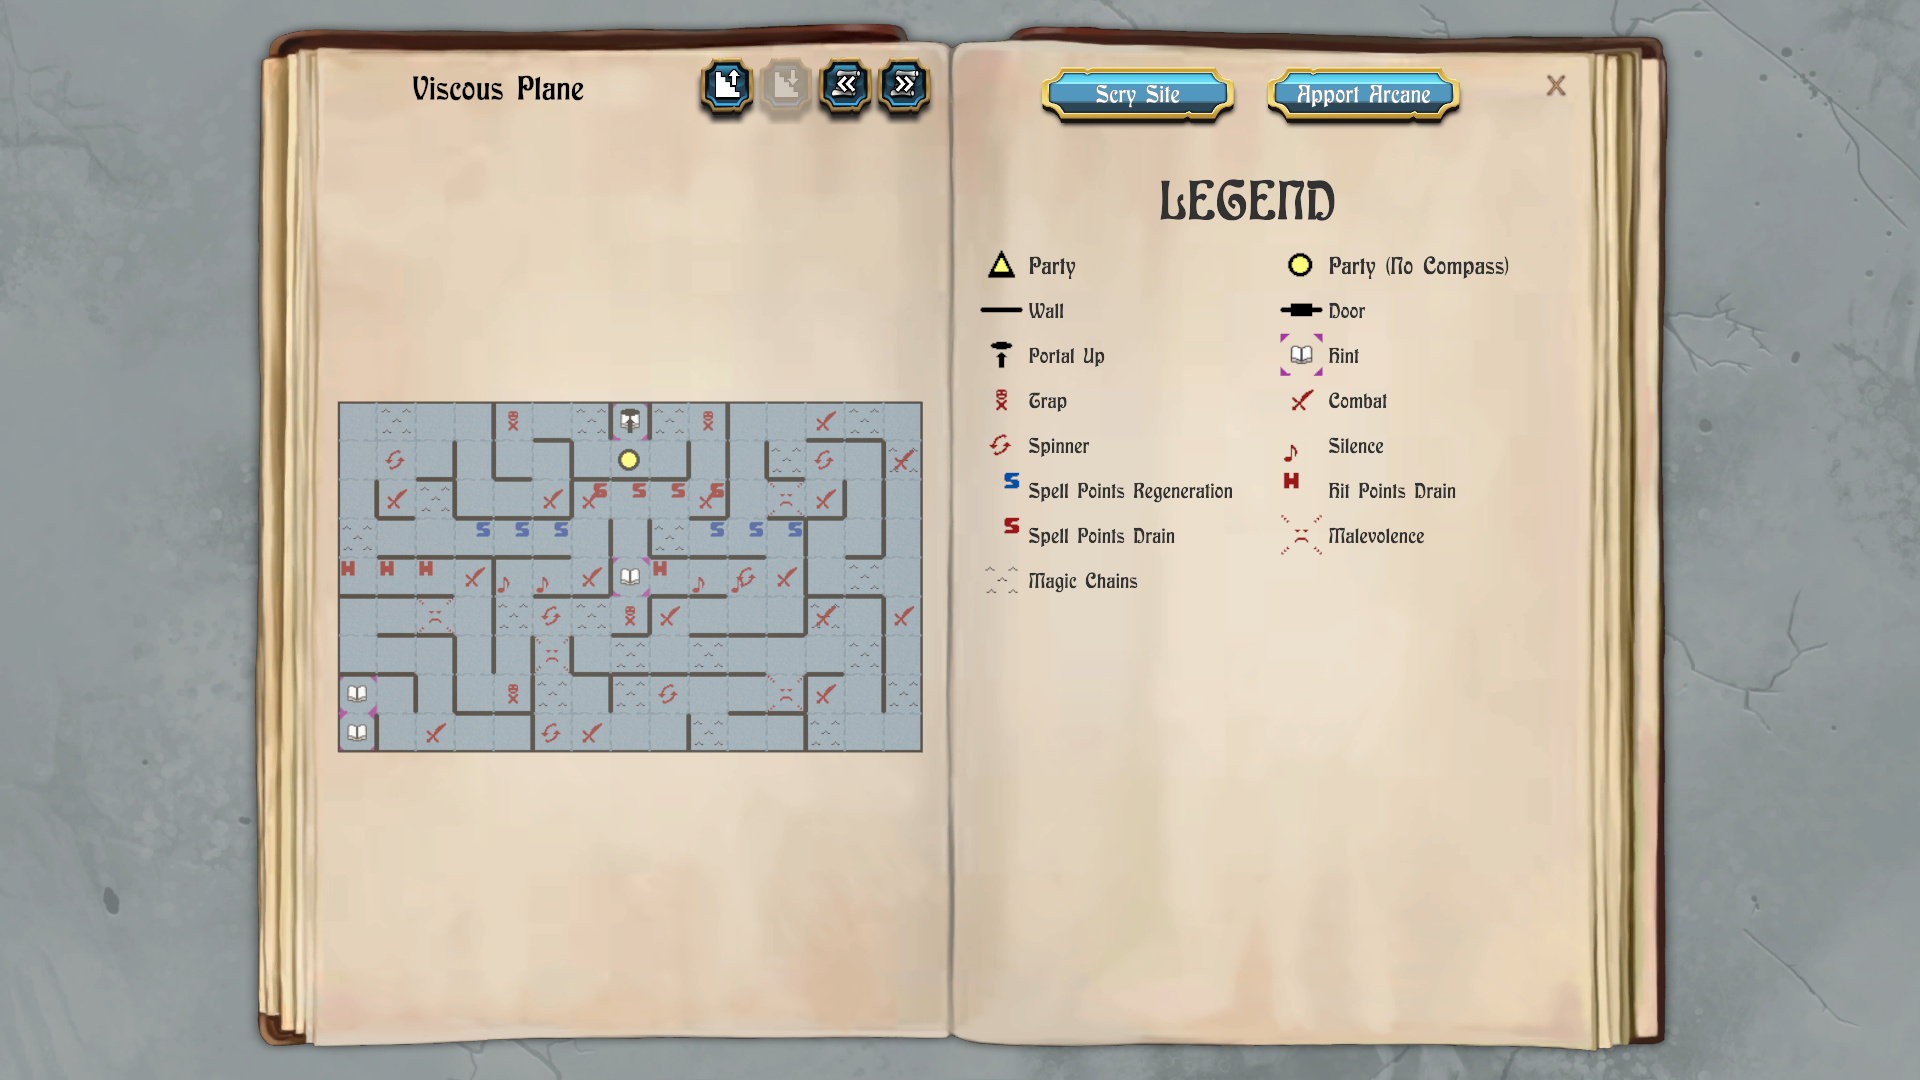
I start off at 2N 12E on the map of the Sanctum. I win fights against
random monsters at 2N 11E and 6N 12E.
Some new items become available, and I get a Diamond Suit after the second
fight. A Paladin or Warrior or Geomancer can equip it for a 15 point
improvement to AC, and in addition to any plate armor they are likely
wearing. Lord Stygar equips it.
I also got an Eelskin Tunic, which only Hunters can wear. It provides a 2
point bonus To Hit, but only offers 4 points of AC. I hold onto it for
now, for when I get a particular item that becomes available during the
last part of the game.
1st Titanium Bracers
I fight random monsters at 10N 11E and then 0N 8E.
I get a pair of Titanium Bracers after the second fight. Talia equips them
for a 2 point improvement to AC.
2nd Diamond Suit
I happen to get a random fight immediately thereafter. I win that and get a second Diamond Suit as loot. Zarathos equips it to max out his AC to -50.
2nd Titanium Bracers
I win fights against random monsters at 0N 5E and 3N 0E. I get a second
pair of Titanium Bracers after the second fight. Mordred equips them for a
2 point improvement to AC.
I thereafter win fights against random monsters at 6N 1E, 9N 1E, 12N 1E
and 12N 5E. The door to the central portion of the Sanctum is at 11N 6E.
Urmech
I go straight south through a pair of doors to reach 7N 6E. I find Urmech
himself, but he's actually amenable to a reasonable non-violent
resolution. You could kill him, but that would not be advisable as it
becomes a lost opportunity that will be become evident very shortly.
I prefer to accept his proposal. He explains that the Old Gods, four of
whom we have now confirmed are dead, made a pact barring the further
creation of life. Tarjan escaped because Ferofist broke that pact and made
an alliance with Tarjan to gain enough power to create Urmech. Urmech in
turn freed himself from servitude to the Dwarves and created more
mechanical creatures to defend himself, triggering the war that has
overtaken Kinestia.
He offers me both Ferofists' artifacts, and a new path to power, before
withdrawing further into his inner chamber.
I obtain Ferofist's Helm and the Hammer of Wrath from a treasure chest at
3N 7E.
Urmech can be found again at 2N 6E. He offers the opportunity for any
class other than Rogue or spellcaster to become a Geomancer, a warrior
that can both wear the heavy duty combat gear and cast earth-based magic
spells. I select Zarathos for it. He's the natural choice since the
Warrior class didn't provide any standout abilities like the Paladin's
saving throw bonus or the Bard's songs or the Hunter's Critical Hit
ability. He promptly equips the Familiar Figurine that I kept stowed away
for him.
He gains three new spells. Earth Dagger inflicts 200 to 800 damage on one
enemy group within a range of 40'. It's an improvement on the
Chronomancer's Witherfist spell in that the damage is the same, but the
range is better.
Earth Song reveals all traps in the level you're currently exploring. But
why bother with that ...
Earth Ward disarms all of the traps on the level you're exploring all at
once. Keep in mind the traps will reset once you've left a level and come
back to it.
*Note* Now I fight my way back up through the previous levels to
Ferofist's, and then to the runestones leaving Kinestia, doing all the
fights I can along the way. I do avoid anti-magic squares so I don't do
every single fight in the main level of Kinestia, just the ones that I can
get while making my way to the exit and using Phase Door along the way.
7th Level Geomancer
I travel to the Crystal Spring and cast Apport Lucencia to return to
Lucencia. I go to the Wizard Tower in Celaria Bree. Everybody advances
another five or six levels.
Zarathos advances six levels, and I insist on 28+ Hit Points and 19+ Spell
Points on every level-up.
I purchase the Divine Intervention spell for him on his second level up.
That acquisition was my reason for coming back to Lucencia briefly.
I purchase the 2nd-level Geomancer spells on his third level up. The Earth
Elemental spell is of no use to me as I always run with a full party of
seven whenever I can. Wall Warp is potentially useful in that it's like a
Phase Door spell, but it lasts until you leave the dungeon level you're
currently in. Trebuchet does 150 to 600 fire damage to all monsters at any
range, and in fact is the spell that Kiel's Overture replicates as a Bard
song.
One of the third-level spells is Petrify, which is like Stone Touch but at
a range of 60'. It might be the best instant-death spell option there is,
given the range, although it won't work on Golem-type monsters. The other
is Roscoe's Alert, which points out anti-magic squares, but on that point
is redundant with Sorcerous Sight.
Another useless spell, available at 4th level, is Succor Song, which
reveals squares that regenerate Hit Points. The useful 4th-level spell is
Sandstorm, which can push multiple groups of monsters 60' feet back. Can
be useful during incredibly intense fights against lots of enemies.
I go back to the rune circle in the outdoors of Lucencia when I'm done,
and have Talia cast Reditus Lucencia to return to the Wilderness. My next
destination is the dimension of Tenebrosia.