-

- Forums
- Chatrooms
- Gallery
- Gameplay Videos
- Upload
- Articles
- Mod Reviews
- Shop SP: Games, Movies, Books
 |
 The wooden bridge to cross the chasm and enter Joril's Lair must first be fixed. Its creaking and swaying support planks will not hold the party if they attempt to cross it without fixing it first. That of course is done by finding and using the BOOK ON BRIDGES which can be found in the Lower Museum on Soth, a slave hiding out there from the Frost Salamanders and Kerish who resides in the Upper Museum. With this book, your party will be able to fix the bridge and make it crossable so you can enter Joril's Lair and proceed in thy journey!
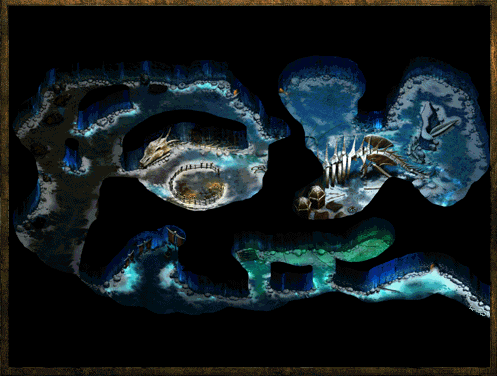
There are two caverns within Joril's Lair, one being the Lair of the Frost Giants that Joril leads and the other a cavern full of Yeti, Greater Snow Trolls and an Auril priestess named Kontik who has come to get revenge on Lysan, the Auril priestess you killed back in Chapter 1 for Kresselack. My route while doing this solution was upon entering Joril's Lair, I went through the small opening that lead to the cavern I have just described and it's the one I will go into detail first on this part of the solution.
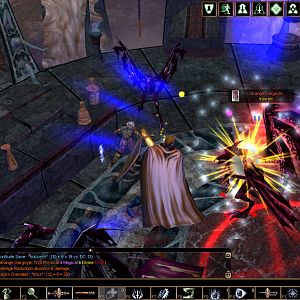
In this icy and chilling cavern is where, as mentioned above, you will come across Kontik, the Auril priestess who has come to get revenge for your murder of Lysan and she is not alone in her bidding as her followers, Black Ice Knights, will defend her to the best of their ability. Now for quick results, I highly suggest you explore this cavern all around fully and kill the foul beasts that will no doubt get your party into trouble if you leave them be. Slay all the Yeti you come across as well as Winter Wolves and Greater Snow Trolls before you walk underneath the skeleton of the dragon to confront Kontik the Auril priestess. I say this because when I first came here, I didn't explore the entire cavern and during the battle against Kontik and her Black Ice Knights, I exposed the five or six Yeti just off to the right of where Kontik could be found and before I knew it, I had a slew of Yeti, Kontik and her four Black Ice Knights on me. Of course, I didn't last very long and I had to reload and remove that threat before I took on Kontik.
Kontik for starters isn't a push over the way Lysan was and she's pretty tough to take down while her Black Ice Knights are cutting their way through your front lines, but with enough effort and Monster Summoning cast behind the Black Ice Knights, I soon had her number along with her followers. Now that the snow was stained with her blood and her followers, searching behind her proved to be well worth the effort indeed as magical items of power awaited me as well as the PURE WATER, one of the three items that Valestis asked me to find from The Severed Hand to help bring back his atrium to its former glory.
Once you have cleared this cavern of foul beasts, you can either return to the entrance you came through or go through the other one at the top right from where you slew Kontik the Auril priestess. Either way, each opening will take you to the Frost Giants and to where Joril is and it is where you should go next because it is here that Joril holds the 2ND BADGE which you will need later on in this adventure.
Joril is a jolly old soul and a jolly old soul is he and is more friendly than hostile and doesn't really give much fright to those who look up, look way up to his hard carved facial features. At first glance, Frost Giants are intimidating but once again, much like our Frost Salamander friend Kerish and his men, they do not attack you at first sight. This of course puts you and your party at an advantage, being allowed to roam freely through their lair and explore it fully so you know what to expect but its building the story this way as well. You see, Joril is also afraid of this person they keep noting as Marketh and it is obvious they would rather speak with you than fight someone who they think is working for Marketh. Once again, I used this to my advantage and when you speak with Joril, give him the impression you are working for Marketh and do everything in your social power to attain the 2ND BADGE without any confrontation. This will earn you lots of experience and also allow your party to walk out of Joril's Lair without a fight against the Frost Giants that Joril leads.
Once you've gained the 2ND BADGE, you will want to make your way to the slave pens where a good number of human slaves are being held and also being sacrificed by Joril to Frostbite, a nasty and foul looking Wyrm who resides in Joril's Lair. Joril feeds the captured salves to Frostbite and his pack of Wyrms to keep the Wyrms happy and out of the Frost Giants hair, a mutual agreement that works for both parties, except for the slaves who become a meal once a day.
This arrangement has Davin, one of the slaves, worried because every day, someone from the slave pens are taken away and fed to the Wyrms which he wants no part of. Davin will do anything to save the rest of the slaves but he needs your help to do so. First of all, avenging those who have been eaten by Frostbite the Wyrm is asked of you, although not in its direct fashion, but you'll get the general idea that your swords will be swinging and your magic will be weaving. Killing Frostbite and his pack of Wyrm's didn't prove difficult for me at all and do make sure that once the battle is complete, you check their lair very, very carefully. I would have walked away from the hidden treasures that lay beneath the straw if I hadn't moved my mouse by mistake and noticed the grabbing hand going for something. Once Frostbite and his Wyrms have been taken care of, return to speak with Davin and of course, to gain some experience.
Now that Frostbite and his pack of Wyrm's have been taken care of, freeing Davin and the rest of the slaves is next, which he will also ask of you to do. The good thing about this is he speaks of the entrance to the cavern where Kontik the Auril priestess was and how that cavern leads to an exit that leaves Joril's Lair. Since that cavern has already been cleared by you, if you've followed this solution step by step, all you will have to do is take care of the single Frost Giant guard who is watching that very exit to the cavern. Simple enough indeed. If you haven't cleared out the cavern where Kontik the Auril priestess resides, do so, then return to Davin and kill the single Frost Giant guard.
If you're interested in killing all the Frost Giants within Joril's Lair but don't want to have to put up getting any of your party members hurt, simply begin attacking them before you free the slaves. Put your party inside of the slave pen and take one party member out to engage in a fight and lead those Frost Giants back to the slave pen. With your party inside the slave pen already, have your party member leading the Frost Giants return and join the rest of your party. Since Davin is blocking the slave pen entrance and the Frost Giants are too big to pass along side of Davin, you now have the Frost Giants circling the slave pen. Pull out your bows and start casting thy magic. Continue doing this until all Frost Giants are dead and collect your loot.
So by now, you've gotten the 2ND BADGE and have freed the slaves and either left the Frost Giants alone or totally cleaned them out and as short as Chapter 5 was, there is still plenty of adventure, fortune and fame to be found within our last chapter, Chapter 6, The Lower Dorn.