-

- Forums
- Chatrooms
- Gallery
- Gameplay Videos
- Upload
- Articles
- Mod Reviews
- Shop SP: Games, Movies, Books
 |
Greetings brave warrior, 'tis a good sight for sore eyes to see you have made it thus far in thy journey for adventure, fortune and fame. Thy wounds look deep, but wounds of a veteran and one that is very close at completing the journey you embarked on so many moons ago back in Easthaven. Please, walk with me for a while so we can reflect on where you've been and how you've gotten to this very point. Yes, yes. This way. Come along now.
This is the final chapter, you do realize that correct? I hope so, for your sake, because what we are going to face together will put you through the test of strength, dexterity, wisdom and intelligence. I should not forget about constitution either for it will be your very will to take a beating that will get you through this foul and evil place. Charisma you ask? You won't need a smile and a wink of thy eye to get you through this part. I assure thee!
Art thou happy with thy weapons? You will surely need a good blade as well as powerful magics to ease thy journey into the heart of this final chapter and I hope you are ready. Let us begin...
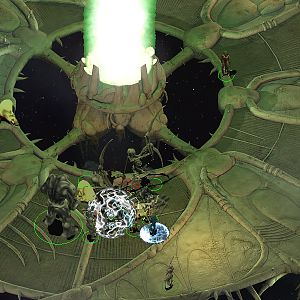
The Lower Dorn is quite the place and even I was taken back by its vast size and network of tunnels and underground chambers that had me scratching my head a few times as to what went where and how I got there in the first place. For you though, all the maps will be easily marked, as they have been in this solution since the start, so without further delay, let me guide you through the final chapter of Icewind Dale!
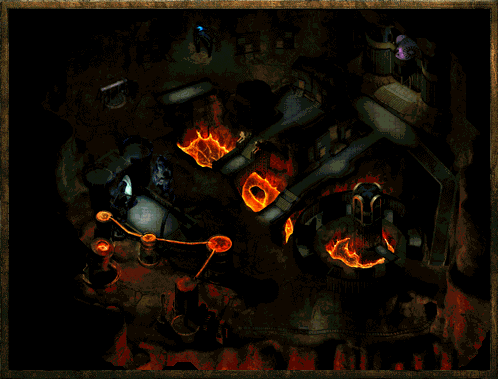 Molten rock will bubble and glow a devils red as you enter this place, blasts of heat will singe thy hair and burn thy skin if you walk too closely to the large vats that are scattered between rivers of melted metal and mining tracks.
'tis a perfect place for Fire Salamanders to walk along and whip the Gnome slaves into shape or perhaps rip out their tongue if they step out of line. Ordered around by the Tarnished Sentries, the Fire Salamanders patrol the grounds looking for any type of trouble and of course, you are like an alarm going off when you step forth to challenge them.
Casting Protection from Fire by your Cleric or multiple ones if you have, will not only help keep the heat from bothering thy skin, but also keep you protected from the fire blasts from the Fire Salamanders while you battle them up close. They shouldn't be much of a problem for thy party and if they are, I suggest you look yourself long and hard in the mirror and ask thyself if you are ready for the challenges that lay ahead.
The Tarnished Sentries will not sit back and watch their patrols go to work on your party and will also join the fray, drawing their bows and launching a slew of arrows in your general direction but don't let that fool you. Although cowards for using a bow, they can hold their own up close just as well and deal some fairly deadly blows on weaker members of thy party. Step around them carefully during thy battles.
As your party continues to stumble across Fire Salamander after Fire Salamander, eventually you will make your way to the doors of Marketh's Keep, where a short little male halfling fellow named Seth will greet you, asking about your business in the Lower Dorn as well as if you have papers stating your reasons for being here. Unfortunately, I had no such papers and if there are any that got you past the situation that happens next, please e-mail me and fill me in.
Seth shook his head as I told him I had no papers and his jaw clenched as he pointed a small, stubby finger at my general direction. "Attack them!" he shouted and I then realized I had possibly walked right into a trap as thieves began to appear all around me, their blades glistening in the molten rivers of metal that ran from the giant vats near by.
Now this was unexpected for myself and my party, which got careless in their approach and I was lucky to still have my mage standing after the battle as many of the thieves targeted him first and chased him down. If it were not for the invisibility spell he had memorized, he would have hit the dirt very quickly.
The thieves appeared all along the bridge and to each and every side of my party, which made this battle very dangerous as my route to escape, if I needed one, was now blocked and using any type of offensive radius spell proved useless. That was, until I recalled the Protection from Fire cast before to protect me from the fire blasts of the Fire Salamanders.
After all the thieves had gone after my fighters when my mage vanished, it was my mage who returned the surprise to them as he began to weave his hands and casted two fireballs into the circle of thieves around my desperate party. Fire danced everywhere and it was only the thieves who took damage as the rest of my party laughed in glee as one by one, the thieves fell to the licking, hot flames of death.
Seth will vanish and if you follow him, he'll lead you into the Atrium but more on that later.
So if fighting isn't your answer at this point, you can do other things, which our readers have sent me plenty of information about, thanks given after I fill you in on what I've learned.
While speaking with Seth, if you have a Halfling in your party, you can use the option to tell Seth you're a famous relative and although Seth will say it's not good enough for him, he'll let you through anyhow.
Upon your return though, if you leave the same way you went in where Seth was found, be warned that you will be attacked for "causing trouble" on the inside and the thieves as described above will come out of hiding.
The same will happen if you use the option "In the name of Kinship" so be wary!
Thanks to Bob, Krystalos, Errand, Tryggiv and Panos for sending this input in!
A tactic was sent in by another reader, in case you wish to battle Seth and take down his band of invisible thieves and an excellent tactic at removing the threat.
"Take your entire party and put them at the western edge of the bridge that leads to Seth. Have your Mage put improved invisibility on your BEST Fighter. Take your remaining two fighters and put them in front of your Cleric and Thief. Have the mage cast Haste on herself and the fighter. Have the fighter walk up to Seth ( don't talk to him but rather sneak behind him), but keep your distance. Have the Mage cast Cloudkill at the foot of the steps next to Seth (don't hit your Fighter). Take the Mage and make Haste back behind your remaining two Fighters. When you see the thing that says 'Thief: leaving shadows' have your Cleric cast Invisibility Purge! Suddenly all the Thieves will be visible to you ( so they can't backstab) and your two fighters will be able to see them (and have none behind them if you place them far enough from Seth). Just cleave through the Thieves (who really suck without stealth, you can even fireball them when they are crowded on the bridge.) While all this is happening just use the last fighter and slay Seth."
High fives to Philip for his tactic at removing this threat.
Seth is one tricky guy to get past, and more information about Seth kept flooding in. Here is more about using a different dialog option.
"When you first speak to him he will ask you who you are and you will have a chance to respond that you are from the Kraken society. He will then test you and ask you what color a Kraken is [Answer: Purple]. When you answer that he will ask you who you come to work for and the your response should be [Answer: Marketh]. Seth will then ask who Marketh serves and the you'd reply [Answer: Ilmater]. I figured this all out by talking with everyone in Lower Dorn before approaching the palace."
Great job done by Enrico, Dana and Will, Claire, Ferry, Joe, Nicholas, Damien, Arnold, Shrike and Silviu for this information.
It's not all foul beasts and men coming out of the shadows to lay the beats on you as you'll come across a young girl by the name of Fengla who sadly happens to have her tongue cut out. She's very helpful, even though she doesn't say much and will hand over the WATCH TOWER KEY which you will obviously need to enter the towering Watch Tower that you found her near.
Fengla was on her way to deliver food to the archers in the Watch Tower but rather than going up once again to get some action with the male archers, she opts to move into the shadows and vanish, leaving you to the dirty work which should make you smile as it's your turn to show those male archers it isn't right to fool around with a young little girl!
Now I found this battle to be pretty difficult not because of the archers in general, but because of the limited space I had to move around. With an archer on the tower floor then more running up along the stairs to the floor above, I had to kill each one before I was able to get to the other. I'm sure you could knit pick your way around them if you wanted to but I couldn't be bothered. I honestly had to reload this a few times because my mage kept on getting waxed by the very top archer who had a damn good shot! Eventually, with a few helpful spells known as Haste, Bless and Prayer, the archers were mine for the taking.
You can rest on the second floor safely and I did so more than once, otherwise I didn't find much use for the Watch Tower after this.
This part of the Lower Dorn has many exits to other parts of the Dorn, those being the Elevator down to the Lower Mines, the entrance to The Atrium, one leading into the Upper Mines and another that takes you to The Twisting Streets that lay just before Malavon's Keep. Check The Lower Dorn Enlarged Map for more details.
I found no traps here.
The main quest within Chapter 6 spans from Chapter 4 and Chapter 5 and that is the quest to find all six badges which is the key to giving you entrance to the final and last battle that will complete your adventure and give you the answers as to who and what is behind all of this. The badges that can be found in Chapter 6 will be listed and because it is an ongoing quest between three chapters, make sure you don't miss any because you'll be pulling your hair out if you do!
3RD Badge is found within CHAPTER 6 on Maiden Ilmadia in the Upper Mines.
4TH Badge is found within CHAPTER 6 on Brother Harken in the Upper Mines.
5TH Badge is found within CHAPTER 6 on Marketh in Marketh's Palace LVL 2.
6TH Badge is found within CHAPTER 6 on Malavon in Malavon's Keep.
As more and more e-mails came through, I realized that you can receive more experience for helping Ginafae escape and make her happy that you didn't kill Marketh. To do this, you'll have to keep Marketh alive and also retrieve a potion which can be found in Malavon's Palace. The potion looks exactly like an Oil of Speed potion and is situated in the room south of the throne room in Malavon's Palace. This potion can remove any kind of curse or magic ward and this is what Ginafae needs.
Thanks to Silviu and Jean Paul for this added information.
Alright, perhaps not a quest for she more than readily gives you the WATCH TOWER KEY but it should be noted it is worth while to receive this key because you can rest at the very top of the tower. Although you will have to take care of the pesky archers within, it's still a good place to base your operations if you do need a place to rest.
Guello's quest is simple and he needs to gain your trust before he continues on with anything else he has planned to tell you and that is to slay the Salamander King Shikata as well as his kin who are watching over the slaves and Guello within the Upper Mines. Do this and return to Guello for your reward and other information.
Tarnelm will ask of you to kill all the Fire Salamanders above the Lower Mines as well as find some FOOD for himself and the other slaves who make this area their home. The FOOD he seeks can be found within Marketh's Palace LVL 1 within the kitchen. Return this to him, which it will be a Sack of Potatoes and you will be rewarded as well as told of another quest he would like you to complete.
After you have returned from Tarnelm's first quest, a second will be asked of you and this time it is more brute force that you will need rather than playing fetch all afternoon. The Umber Hulks in the area have been searching for a hidden Gnomish Settlement and Tarnelm fears that they will find it soon enough. You are to find these Umber Hulks and slay them before they find the Gnomish Settlement. Check the Enlarged Lower Mines Map for a more detailed location of where you will have to go to meet up with these Umber Hulks and gain access into the Gnomish Settlement.
If you recall from The Severed Hand, Valestis was looking for some particular items to bring back his garden at the top of his tower and it is here that you will find the last remaining items you will need to bring back to him. These items are found on a Dark Elf Merchant named Nym within the Gnomish Settlement who will sell you the ANIMALS you will need. Return to Valestis once you have all of the items he requested for your reward.
The last of Valestis' quest is that of the SEEDS he had asked for and those can be found within Malavon's Keep after you have defeated him, hidden in a far room within the keep.
Deep within the Upper Mines resides a Ruby Priest named Guello who Beorn will ask for you to set free and settle his thoughts and suspicion of you and your party members. Once you have found Guello and freed him as well as completed what he asked of you, return and speak with Beorn for your reward.