-

- Forums
- Chatrooms
- Gallery
- Gameplay Videos
- Upload
- Articles
- Mod Reviews
- Shop SP: Games, Movies, Books
 |
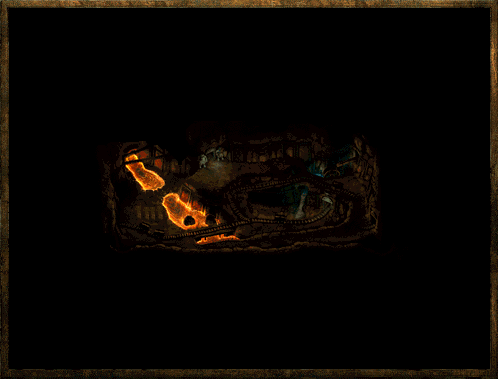 The sound of pick axes ringing off the rock face deep within the mines tunnels can be heard as Gnomish Slaves work day in and day out, digging their way through the earth to find new resources for those who have enslaved them. Do thy best to help any if you can, but keep your mind on the cause for within these very mines are the 3RD BADGE and 4TH BADGE which can be found on the Priest Maiden Ilmadia and Brother Harken respectively. Finding them won't be a problem.
Now here is also where you will find Guello, a Ruby Priest that was captured by Marketh's henchmen Seth and thrown into the mines to work with the other slaves and fortunately, he still has his tongue and will be able to speak with you when you find him. Guello will ask a small favour from you and that is to kill the Salamander King Shikata and his kin who are watching over the slaves and Guello within the mines. An easy task for such brave warriors such as yourself yes? Fairly so and I had absolutely no trouble at all with Shikata or his pals who reside in this area. Once Shikata and all the other Fire Salamanders are slain, return to speak with Guello for your reward.
Once you've cleared out this area, move on to the next. There were no traps to be found here.
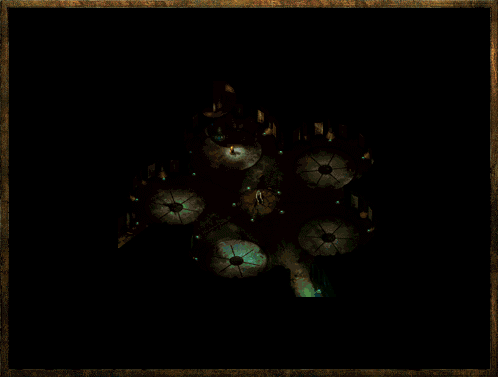
 Priestess Maiden Ilmadia resides here along with her fellow followers of Fire Giants who were sent by Maiden Ilmadia to keep the Fire Salamanders in line, who also dot these parts of the Upper Mines and who will attack you on sight. Swing thy blade through their burning scales and drop them to the very dirt and continue on thy way. Just like the Frost Giants back in Joril's Lair, the Fire Giants in Maiden Ilmadia's Lair will not attack you, at least not just yet. You can speak with one of them to get directions to Maiden Ilmadia so you can go have a little word with her and of course, to attain the3RD BADGE which she holds.
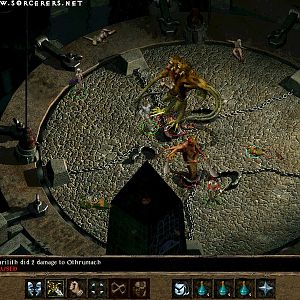
This battle is a major pain in the rear, or at least I found as I continued to get waxed by the wolf pack tactics used by Maiden Ilmadia and her ever so hot headed Fire Giants who, as you may recall, were friendly to us before, have now turned against us. The wolf pack tactics are very simplistic and they work well for a party that isn't very well prepared for the battle at hand, which I was not when I first came to speak with Maiden Ilmadia. First of all, all the Fire Giants that are near by will flock to Maiden Ilmadia to aid her in putting you out of business, which they do an excellent job as they cross the wooden bridges and come from behind.
The first time around, I was not at all prepared for that due to the fact all the foul beasts before hand were pretty stupid. If they didn't see you, they didn't come knocking. I ask myself, where was this great tactic during the rest of the game? It would have kept everyone from pulling out each monster one by one during the game and it's disappointing to play a game where the AI is just so lame. This time though, I give them full credit for using the surroundings to their advantage. That's when I had to begin to think out my own plan of attack as well as defensive positions for this battle.
First of all, cast Haste. Although all your party members will need to rest afterwards, it's one spell that is a great help in times like these. Second, add Bless and Prayer to your party, two excellent spells that will help you during the battle. Third, Monster Summoning 1,2,3 and Elemental Summoning are very helpful since before you speak with Maiden Ilmadia, you can place them at the lip of each bridge. As the Fire Giants come to Maiden Ilmadia's aid, they'll have to battle through your summoned creatures first.
With that done and laid out, I spoke with Maiden Ilmadia and got myself ready for a large scale battle of blood, which I hoped was not going to be mine!
One member of my party immediately went after Maiden Ilmadia while a second and third took care of the two Fire Giants that are situated near her during the dialog and afterwards. The fourth and fifth armed with bows, launched arrows at the Fire Giants battling on the bridge, one attacking either side. Last, my mage began weaving like a mad man and I dealt out everything I could to the bridge on the right side for it is here a very large slew of Fire Giants come from. Remember, Fire Giants are resistant to any fire damage, so use cold based attacks if you can to deal a greater amount of damage.
When the two Fire Giants that were close to Maiden Ilmadia were dropped, my second and third party members helped finish Maiden Ilmadia off then immediately went to patrol the bridges and finish off any Fire Giants that made it through the monsters I had summoned. The two members using bows continued to launch their arrows into the fray and I had my last party member, my mage, do some house cleaning and picked up all the items I could while the battle was taking place. Being inside of the shack, the remaining Fire Giants simply attacked my fighters rather than going after my weakest character as many foul beasts like to do.
Gave my blades a good cleaning of their blood and wrapped it up.
Another tactic was sent to me, this one to take care of all the Fire Giants and Maiden Ilmadia in a few area effect shots. Here's how it was done:
"I enter the cavern through the lower of the two entrances on the left side of the cavern. I then send my thief, equipped with Boots of Speed (a potion would work, too) to talk to Ilmadia. When she decides to attack, I run the thief back to my party, still standing near the entrance we used to come in. Interestingly, the fire giant guard will not attack until Ilmadia arrives on the scene, and with the thief's speed you beat her back by a long shot. I waited until she order the giant to attack and then left the cavern. I then re-enter from the upper of the two left side entrances and walk my party close to the first bridge. I had my mage and druid summon elementals on the bridge, and then walked my mage downward onto a small peninsula like outcropping of the terrain. Slowly but surely all the fire giants amassed in the valley below, eventually joined by Ilmadia herself. It was now a simple matter of casting area effect spells on the hapless creatures below, and finishing them off with arrows. Only one or two brave giants tried to flank me by coming over the bridges, and they were held off by the elementals until I could bring the mage around or simply pincushion them with arrows... The massacre complete, I somewhat sheepishly explored the rest of the cavern, picking up the items from her body and her shack, pretending the victory wasn't tainted by taking advantage of an AI flaw."
An AI flaw. Gotta love that one! :) Thanks for this wonderful tactic Matt!
Don't forget to grab the 3RD BADGE which is on Maiden Ilmadia's corpse for you will be needing this!
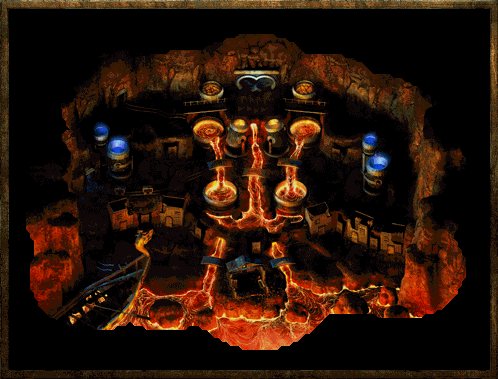
 This is an interesting room and one should also note, the room where all six badges will be used to gain use of the stairs that lead upward so you'll be coming back here in good time. Since we're here already though, I didn't think it was reasonable for me to skip this part and save it for the very end and doing this now isn't going to make much of a difference if you saved it for later. You're here so clean it out!
You will be greeted by Bone Guard Skeletons, Greater Mummies, Zombie Lords which are scattered through the room and crystal like formations which surround bodies caught in the stasis within. You'll also be introduced to a nice looking Idol who will either annoy you or not be an issue altogether.
For myself, the Idol was simply nothing to get worked up about even after I had come across a good amount of messages regarding the Idol and how difficult this room was, it wasn't as difficult as people were making it out to be. Now from what I've heard, the Idol is the source of these foul undead creatures and continues to bring them back to life and send them back to fight you over and over again until you kill the Idol. I never experienced such a thing and the Greater Mummies in the room caused more of a threat to my party than anything else for the spells they cast I had no protection from. Symbol of Pain for one which sent wracks of pain through my characters and another one that left a few of my party members immobile, leaving them as an open target to the Zombie Lords who shuffled slowly towards them. Fortunately, I didn't lose anyone as my mage brought forth Summoned Creatures and Summoned Elementals to help defend my unmoving party members.
My clerics ran around casting Protection from Fire on everyone who was immobile because the Greater Mummies just unleashed blast after blast of fire explosions on the unmoving party members along with Symbol of Pain gave me a headache while I battled them with my two Clerics and my Mage. All my fighters were unable to move which only slowed things down. It's not a fun battle when you have three Greater Mummies blasting you over and over again which were my main concern and target during the battle. Remove the Greater Mummies and you remove the majority of the threat.
By the time my fighters were able to move again, I was thankful no one had died and that I was able to slay the three Greater Mummies which left the Zombie Lords to be dealt with by a very weakened front line of fighters. My mage had used all his spells and my Clerics had nothing left in terms of healing because they kept the fighters alive when they were unable to move. By now, all that was left was this silly looking Idol just near the stairs, which I had my fighters take care of quickly, which results in all the crystal stasis that surround the people in the room to become undone.
It would be even wiser to simply rush the Idol and take it down as quickly as possible. By doing this, all the other undead left in the room will self-destruct.
Alan and Kim sent this and our thanks to them for it!
Set free are Brother Harken, Sister Incylia, Brother Adson and Brother Perdien which I suggest you speak to each and everyone of them and learn what has happened as well as what has been going on and how they got there. Learn as much as you can and get the 4TH BADGE from Brother Perdien who will hand it over to you as he explains the situation of what became of him after he left Easthaven.
Thanks to Damien for the heads up on Brother Perdien handing you the badge rather than Brother Harken as I had noted.
Once you've done all you can, prepare thyself as we head to explore The Lower Dorn - Lower Mines.