-

- Forums
- Chatrooms
- Gallery
- Gameplay Videos
- Upload
- Articles
- Mod Reviews
- Shop SP: Games, Movies, Books
 |
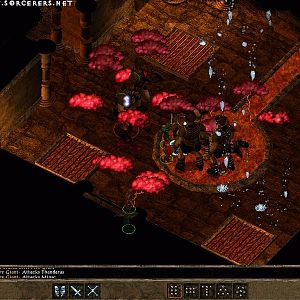
 Welcome back to Easthaven brave warrior, it has been quite a journey has it not? Who would have thought you would be returning to where you first started but the place does look different does it not? The buildings are now ruined and smashed and a very thick layer of ice which makes up the Crystal Tower lays about Easthaven. Joining all of this are Cyclops' who tower above thee waiting to smack thy body into the snow you stand on. The villagers can be found, still alive and to the south, being guarded and once you get past the Cyclops there, speak with Everand who will share some information with you as to what has happened and how to get into the Crystal Tower.
You may also want to make your way to speak with Jhonen who, if you had bothered to help back when you first started in Easthaven, will have a sword to give to you, which you would have acquired from the Sea Elf if you completed that particular quest back in the Prologue. This sword will help you greatly during the battle that you will be facing shortly, so make a note to return and speak with Jhonen if you had in fact helped Jhonen before. The reward is well worth it.
When you feel you are ready, take your first step into the Crystal Tower and prepare for the battles and events at hand!
 The entrance to this frozen place, which used to be the Temple before everything was covered in ice, will only be revealed to thy party when you speak to the captured townsfolk, and more importantly, Everard who can be found in the area just south of the bridge. Upon your entrance, an animated sequence will take over as Everard walks into the Temple and will enter the dialog to discuss Jerrod's Stone, which you are to find another possible way to its new location. To do this, simply climb up the stairs to the next waiting level. Do note, once you've entered the temple, you will not be able to leave so make sure you've done everything if there is anything you wanted to do because we are approaching the final leg of your adventure!
 An ordinary room, filled with mirrors, beds and of course, ice which is the room that will be and is your only resting place if you need one.
Before heading onwards, I suggest you cast Protection from Lightning because you'll be experiencing a lot of that on the next level so prepare thy party and protect them from the damage that will bring everyone to their knees if you do not have this type of protection. A cleric can handle this spell, so memorize as many as you can.
Other helpful spells are Haste, Courage, Prayer, Hope and Bless, which will not only speed up your attacks for your front line fighters, but also give you a plus to hit as well as add to each characters saving throws for the duration of the spells. Once you're good to go, head up and prepare to wax some ass, but do take note, this is not the final battle.
 The False Pomab awaits thee on this level along with a few of his most trusted foul beasts known as Crystal Sentries, which are something else to bring down while the False Pomab begins to weave his magics and electrify you with his bolts of lightning.
This battle, for the first time I came across it was a pain in the ass and I had to reload it and then proceed to protect myself with Protection from Lightning casted by both my clerics on my entire party, just so I could last long enough to take down each duplicate image of The False Pomab. The Crystal Sentries I kept battling with five members of my party while my strongest and hasted front line Paladin, took care of The False Pomab, simply hacking and slashing at any image she came across.
To make things easier on you during this battle, a few readers sent in their own personal comments about this in how to remove the False Pomabs running around the room.
"The Crystal Sentries always seemed to attack my Mage, so what I did was kept the Mage in the doorway that I entered. I then kept my other characters surrounding the Mage and fighting the Sentries. Since all the False Pomabs seem to like to run around the throne in the middle of the room, I just casted Cloudkill right around the throne. Cloudkill will wipe out all the False Pomabs right away, and I even managed to take out the real one with it also."
Wish I had such an easy time with this one as Gordie did. Thanks for the input!
Another trick in knowing who the Real Pomab is over the False Pomabs is to use range weapons until you see that you HIT the Real Pomab in the status box. As soon as you see this, concentrate your attacks on him and once he dies, all his False Pomabs will vanish and the threat will be minimal as you finish off the Crystal Sentries.
Thanks to Silviu, Errand and Phil for this information.
After the battle is complete and you're licking your own wounds, return to the previous tower level and rest up.
DO NOT cast any spells on your party on your way up to the final battle because it'll only get removed once the final and last battle takes place. You should have the following spells memorized to help you speed things up when you're ready.
Offensive spells are useless during the final battle, so don't bother stocking up on them and think defensive. Your fighters can handle the blows while your clerics can heal them from behind. Potions are always another nice touch and if you have any that will raise any of your characters strength above 21 or more, quaff them as the battle starts. It'll make connecting with a weapon easier as well as deal more damage to blows that strike true! Healing potions should also be in each characters quick slot so they can rely on themselves rather than having clerics going crazy with healing spells. If you can have your clerics battling along side of your fighters, do so.
So with this in mind, prepare thyself and let us go brave warrior! It's what you've been waiting for!
Proceed up the ladder which will take you into a very small room with a magical mirror. Simply click on it and have your party walk towards it, more or less "entering" the mirror which will take you to the last stages of your battle.
 As stated above, hopefully you're well prepared. Enjoy the speech you hear and of course, sit back and watch what happens as it is very enjoyable to do so. When the time comes though, you'll need all your smarts, strength and know how to fell this final beast of evil! The two Golems that appear are simple distractions and they'll most likely target your weakest character within the party, as many beasts have done during thy adventure. During my time, they went after my mage just as he completed the haste spell and I had them running around while the rest of my party dealt with the real threat. Since my mage was running around quicker than they were, he was still able to cast after spanning the room, stopping then casted and ran away. Golems are so stupid as are the programmers who wrote the AI for the Infinity Engine. I spat in your general direction. Get with it already and smarten up.
Step carefully throughout the room for the traps set are 'Arrows of Dispel Magic' and can spoil your plans in a hurry.
Once you drop the foul beast at the end, that's all she wrote.
I'll see you for the Baldur's Gate 2 Online Solution, which I will be receiving shortly to begin to write up and play.
I'd also like to thank everyone who continues to send me e-mail on quests and little things I've missed because without you guys keeping an eye out for me, this solution wouldn't be as full as information as it is now!
Sylvus Moonbow - Paul