The Quest begins once you've gained at least one point of positive
reputation with Maia. A member
of the Royal Deadfire Company named Atsura has assigned Maia the job of
delivering a couple of Sealed
Royal Deadfire Company Missives, which now appear in your
inventory. One missive must go to Tuaha in Port Maje, and the other must
go to Harama in Tikawara.
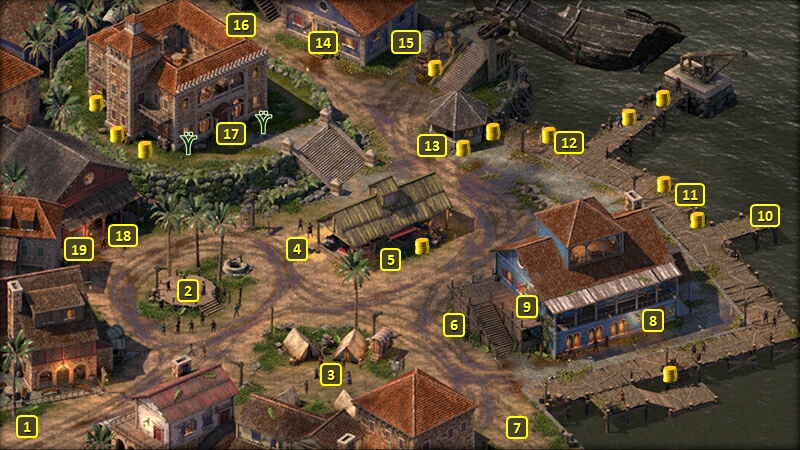
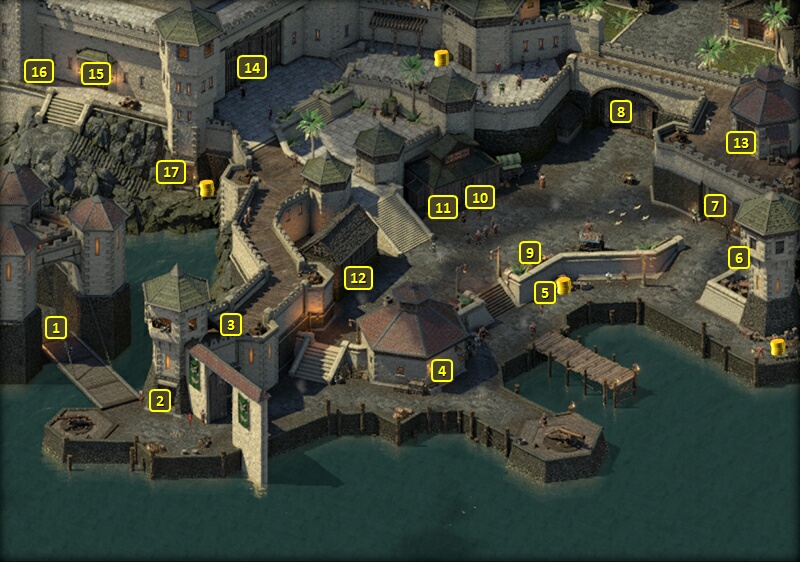
Tuaha will be at #6 in Port
Maje Harbor. She's worried about a Huana spy stalking her, and
would like you to take care of it. A dialogue option based on having the
Rauatai background, or a combined Diplomacy 4 and History 3 check, can
convince her to accept her
Missive without you doing anything about the stalker. Doing so
will help complete the quest, although it will affect the endgame
slides (which may be better for Port Maje itself in the long run).
The Kaura Craftsman will wander about, frequently around points #2, #3
and #5. He'll also be wearing a conspicuous toothed-necklace that makes
him stand out.
An Insight check of 3 will notice the ink on his fingers, and identify
him as Tuaha's stalker. A Bluff check of 3, or having Maia
talk to him, can result in him willingly leaving Tuaha alone. You can
also kill him outright to ensure there's no interference with Tuaha's
job.
However, be advised that getting the Craftsman off of Tuaha's back and
giving her the Missive
will result in Governor Clario and Stormspeaker Ikawha getting
assassinated for purposes of the endgame slides.
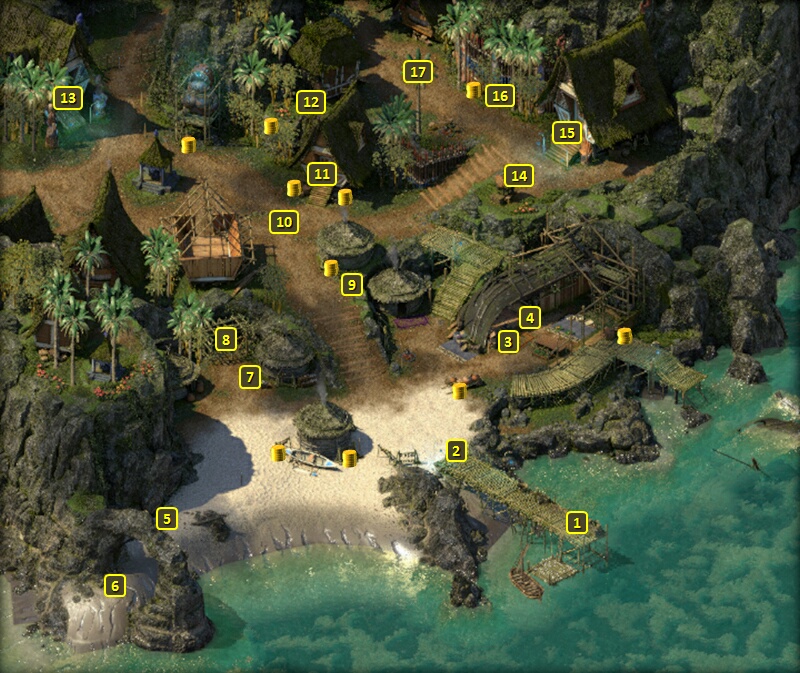
You'll start off at #1 on the map of
Tikawara. Go to #10, where
you'll witness a mob of Huana accosting a Rauatai operative named
Harama. Maia will demand that
you intervene. How you respond will not affect your reputation with her.
One route is to let the mob kill Harama, which may actually be better
for Tikawara itself come the game epilogue itself.
If you want to save Harama, you can choose the Aggressive option to
start a fight with the mob itself at more than one point during the
ensuing conversations. You can still interact with the rest of the
residents of Tikawara afterwards.
You can also talk them down, starting with an Insight check of 3.
Followups that will get them to back down include a combined check based
on both Coastal Aumaua as your race and Deadfire Archipelago as your
background, having 3 points of positive reputation with the Huana, or a
combined check of Intimidate 4 and Bluff 3.
You will deliver the Missive
to Harama afterwards, and he departs after some conversation that
includes flirting with Maia.
Maia will talk to you
afterwards. How hard you want to press her on the nature of her
assignment and the Missives is up to you, and won't affect either your
reputation with her or the Quest itself.
However, she will now want to report back to Atsura.
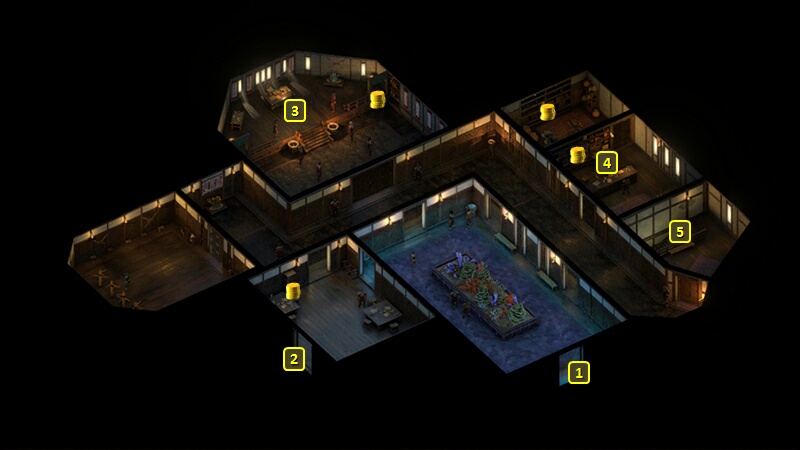
You'll start off at #1 on the map of Main Floor of the Imperial
Command. The stairs to the Lower Floor are at #5.
Simply going down the stairs to the Lower Floor prompts Maia
to announce that she'll be leaving your party to carry out her own
mission, and then leaves. She returns in about four or five days, give or
take. And by return I mean you'd have to go to an Inn or your ship or
wherever else you can change your party members to get her back.
She'll want to talk to you afterwards. She admits she carried out an
assassination on a charismatic Ranga of a Huana tribe, and is troubled
by the repercussions of always following orders. None of your responses
will affect your reputation with her. She'll want to see Atsura again.
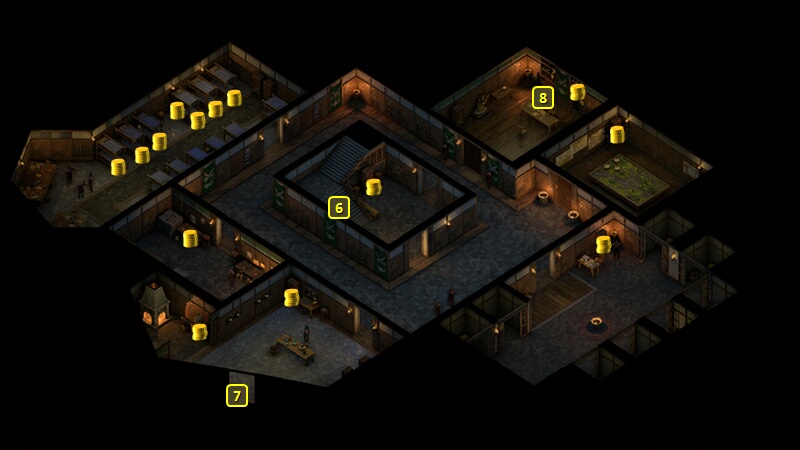
Atsura will be at #8 on the map of the Lower Floor Imperial
Command. Speaking to him concludes the Quest with an xp reward, as
well as an Arquebus named Three
Bells Through.
Maia will want to have a
concluding conversation with you afterwards. Pro-Rauatai responses will
win reputation with her.
Sorcerer's
Place is a project run entirely by fans and for fans. Maintaining
Sorcerer's Place and a stable environment for all our hosted sites requires a substantial amount of our time and funds on a regular basis, so please consider supporting us to keep the site up & running smoothly. Thank you!
Supporting Sorcerer's Place
Has Sorcerer's Place been useful? If you'd like to show your appreciation
for our hard work on the site, and help us pay the bills the site generates
every month, please consider helping support SP.
Thank you!
"*Mercy is a shield used by the WEAK. Mercy is WEAKNESS. Mercy is DEATH. NO ONE is innocent. Mercykillers slay mercy and its WHORES wherever their plague has carried them.*" -Vhailor, Planescape: Torment

 You'll start off at #1 on the map of
Tikawara. Go to #10, where
you'll witness a mob of Huana accosting a Rauatai operative named
Harama. Maia will demand that
you intervene. How you respond will not affect your reputation with her.
You'll start off at #1 on the map of
Tikawara. Go to #10, where
you'll witness a mob of Huana accosting a Rauatai operative named
Harama. Maia will demand that
you intervene. How you respond will not affect your reputation with her.