Pillars of Eternity 2 logo


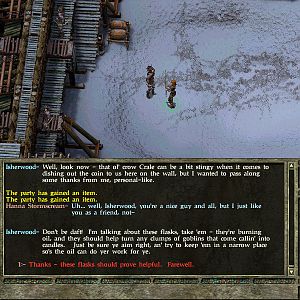
Pillars of Eternity 2 Online Walkthrough by David Milward

INTRO & ABOUT | CHARACTERS | COMBAT AND RULES | ITEMS | SHIPS
Quests | Areas | Mega Bosses
Disable all ads!

Main Game: Main Quests | Character Quests | Side Quests | Tasks | Bounties
Faction Quests: Huana | Principi | Royal Deadfire Company | Vailian Trading Company
Expansions: Beast of Winter | Forgotten Sanctum | Seeker, Slayer, Survivor

Seeker, Slayer, Survivor Main Quests: The Proving | The Rite of Passage | The Crucible | The Champion of the Hunt | The Hunter Hunted
Seeker's Face Quests: The Seeking Face | The Seeking Face's Hunt for the Adra Pearl | The Seeking Face's Hunt for the Fortuneteller's Ear | The Seeking Face's Hunt for the Haemneg's Handmaiden
Slayer's Face Quests: The Slaying Face | The Slaying Face's Hunt for the Luckless Coin | The Slaying Face's Hunt for the Titan's Heart | The Slaying Face's Hunt for the Hunter's Head
Survivor's Face Quests: The Surviving Face | The Surviving Face's Hunt for the Matron's Skull | The Surviving Face's Hunt for the Uncut Gem | The Surviving Face's Hunt for the Finger of the Exiled Queen
Seeker, Slayer, Survivor Side Quests: Potions of Plenty

Temple of Toamowhai

The Seeking Face

  1. This Quest starts after you have started The Crucible Quest, and have indicated a willingness to Engari at #10 in the Temple of Toamowhai to retrieve an artifact for the Seeker's Face.

    Engari will indicate that the artifact can be found in a place called Kohotekana Expanse, and then open the door at #12 for you. It provides access to Kazuwari at #7.
  2. Kazuwari

  3. Pingaka Ravine is at #8, which has an unstable bridge that you'll need to cross in order to progress this Quest.

    You can safely cross it without checking on the condition of the bridge itself as long as the Watcher can make a Resolve check of 12 and a Dexterity check of 14, and then everyone in the party can make an assisted Athletics check of 8.

    Examining the bridge offers multiple opportunities to gauge its condition through skill checks. A Survival check of 13 indicates that the rope of the bridge can't hold up much weight. A Stealth check of 15 indicates that the wood is not of the sort that a scout would want to quietly cross over. A Mechanics check of 12 suggests that the bridge can be reinforced.

    Searching for an alternative pathway, after making either a Mechanics check of 14 or a Survival check of 14, indicates that there's no way forward but over the bridge.

    If you attempt to cross without reinforcing the bridge, and after making any skill checks that determine the bridge's condition, you can cross. The difference is that you only need to make the Dexterity and Athletics checks. You won't need to make the Resolve check.

    You can attempt to reinforce the bridge through your own labor. It takes two days, and your party members will end up Fatigued. But you can cross without any more skill checks.

    You can reinforce the bridge with certain spells, like the Wizard's Binding Web or the Druid's Tanglefoot. You can then cross without any more skill checks.

  4. Seeker Statue
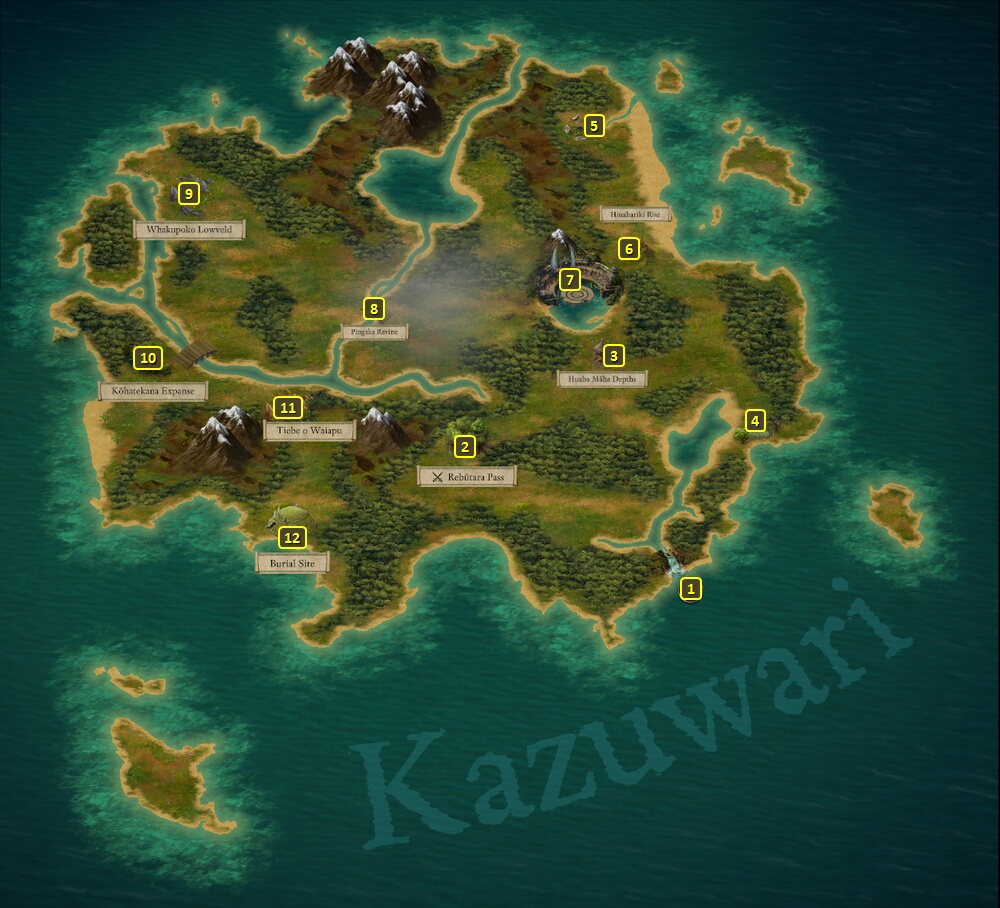
The Kohotekana Expanse is at #9. A Survival check of 11 will reveal that the trails are rarely used. There will be a trail on the left and a trail on the right. It won't matter at this point which one you take.

    Go further, and you again have trails that branch left and right. But now there will be a statue as well. A History check of 10 can identify it as a rendition of the Seeker. Examining the statue will allow you to see that either its left or right eye socket is empty, while the other socket has a stone in it.

    Taking the trail in the same direction as the empty eye socket (e.g.,, taking the right trail when the right socket is empty) leads to a party member getting kidnapped. You'll also be brought back to the start of the Expanse which will undo any progress you may have made. A party member will get kidnapped each time you take the wrong trail. Getting your party members back means finding the cave at the heart of the Expanse. If you leave the Expanse while any party members have been kidnapped, those party members will die permanently.

    Taking the trail in the same direction as a full eye socket (e.g.,, taking the left trail when the left eye socket has a stone in it) means coming closer to the cave. It also avoids any party members getting kidnapped. So the process is one of examining the statue and seeing which eye socket has a stone in it, and then taking the trail that matches the full eye socket, rinse and repeat.

    Taking the correct trail enough times brings you to a point where there are left and right trails, but now also a central trail. The left or right trails lead to a kidnapped party member and starting over. Taking the central trail means the passage of 12 hours (and the cancellation of any resting bonuses in place), and entering the cave.

    You'll then have to fight a pair of Dire Weavers and several Dire Weaverlings. The Dire Weavers shoot single-target webs that both cause damage and Paralyze. They can also teleport backwards periodically. They also explode into four Dire Weaverlings when killed.

    Click on the soul energy in the middle of the cave after the battle is over. You will obtain The Sought Skull and speak with the spirit of Aexica.

  5. Now return to the Temple of Toamowhai and give The Sought Skull to the Pool of Memories at #11. Three new challenges become available which must be completed in The Crucible.

  6. Shades of the Seeker

    You will face off against several Nightmare Shades. All but one of them will be utterly impervious to any harm while enjoying a condition called 'Shade Invincibility'. Run your mouse pointer over each one until you find the one who doesn't have Shade Invincibility. That's the one you need to take out. Kill it, and one of the remaining Nightmare Shades will lose Shade Invincibility. Repeat the process until you take out each Shade one by one. Be careful, as they like to go for any squishy spellcasters and the like in your party.

  7. Secrets of the Ooze

    This challenge involves several Bog Oozes and a couple of Ancient Wraiths. They'll stay on the east side, which is also full of Sigils of every sort. The Bog Oozes will each split into two Lesser Bog Oozes when killed. As long as you keep yourself protected from the Sigils with all of the Wardstones, you should be fine.

  8. The Spider's Web

    This challenge involves a few Dire Weavers and several Dire Weaverlings. The Weaverlings will enjoy a regenerative benefit called 'Mother's Recovery' from the Weavers, although the Weavers themselves won't. But the Weavers will themselves split into four Weaverlings upon dying. So despite the numbers, area-of-effect attacks won't serve you well here. Your party needs to concentrate their focused attacks on one enemy at a time, either to outpace a Weaverling's regeneration or to bring down a Weaver who starts off with a lot of Health.

  9. Complete one of the Challenges, and two new Tasks become available. First is The Seeking Face's Hunt for the Adra Pearl, and then The Seeking Face's Hunt for the Fortuneteller's Ear.

  10. Furthermore, complete one of the Challenges, and a band of Ciphers known as the Quiet Five will show up. Their leader, Yolatli the Elder, will threaten you telepathically before her group takes their turns in the arena.

    The spirit of Aexica will speak to you for a while after you complete another Challenge or one of the Tasks.

    Yolatli the Elder will have another brief conversation with you after completing either another Challenge or a Task.

  11. The Quiet FiveCompleting two of the challenges means you now have the option to take on The Contest of the Seeker challenge. Accepting this challenge means choosing an exclusive alliance with the Seeker's Face, and precluding completion and/or continuation of either The Slaying Face or The Surviving Face Quests.

    The challenge itself is a battle against the Quiet Five led by Yolatli in The Crucible. This can be a tough fight, especially as all of them can use powers like Puppet Master and Ringleader. Starting the fight by having everyone drink Potions of the Focused Mind or using a power that provides immunity or resistance to Intellect Afflictions can go a long way in this battle.

  12. You'll be returned to the Temple of Toamowhai. Go to the Pool of Memories at #11. The Quest will be completed when Humaire and Engari both congratulate you on becoming the Champion of the Seeker. You'll also get a Soulbound Rapier called the Seeker's Fang.

    The Crucible Quest is completed at the same time, and The Champion of the Hunt Quest begins.

Amazon.com
Amazon.ca
Amazon.co.uk
Sorcerer's Place is a project run entirely by fans and for fans. Maintaining Sorcerer's Place and a stable environment for all our hosted sites requires a substantial amount of our time and funds on a regular basis, so please consider supporting us to keep the site up & running smoothly. Thank you!

Disable all ads!