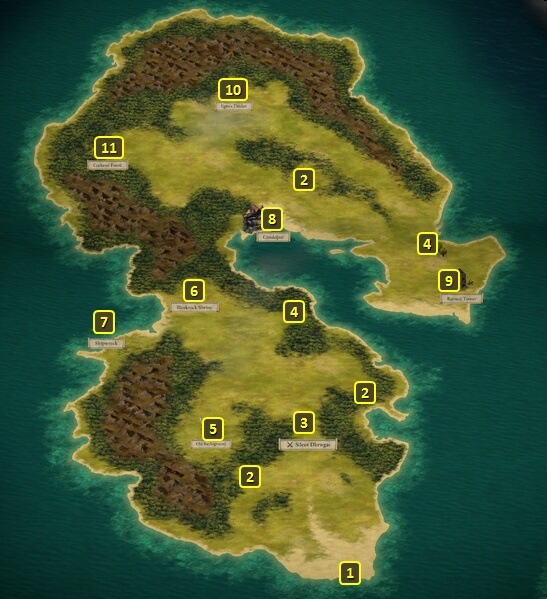
You can, if you do wish to speak to Captain Aeldys, sail for Fort
Deadlight, which is at #4 on the World
Map. First Mate Mabori will be near the front gate. If you speak
to him, he can take you straight to Captain Aeldys.
Aeldys will be in the same room Benweth had been in, within the Deadlight
Donjon. She'll reward you with 2,000cp if you disclose Furrante's
alliance with the Slavers. She instead wants you to clear out the
Slavers, and tells you to meet up with an agent of hers on Crookspur
Island.
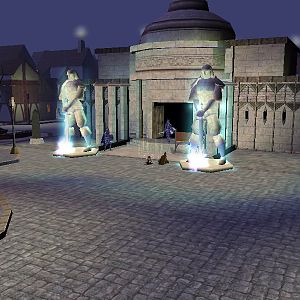
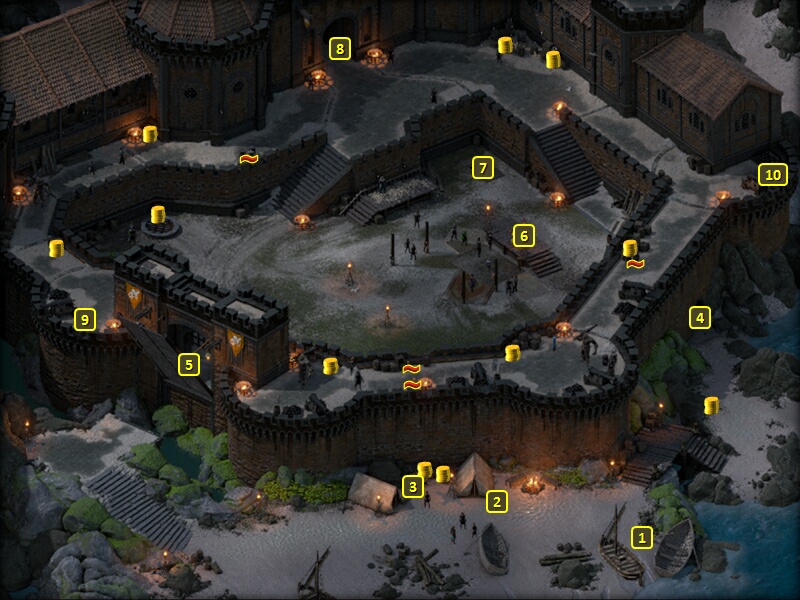
The gate to the courtyard is at #5. The Ogre will let you through with
little fuss, assuming the auction hasn't completed yet.
The auction of Handsome Eliam
takes place at #6. Either buying him, or otherwise letting the auction
for him proceed without making a fuss, will mean that Auctioneer Marocca
will recommend you see Master Kua.
If you purchase Handsome Eliam,
you'll need to see Master Kua first to make the purchase final.
Questioning the legality of the auction, particularly with either a
Bluff check of 10 or a Streetwise check of 10, is likely to get you
expelled outside the courtyard and the gate closed on you. Making your
way back in will mean the local slavers attacking you on sight.
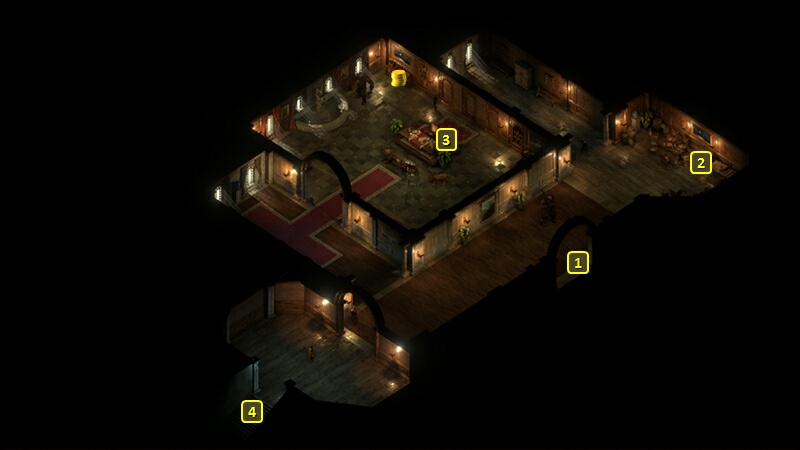
You'll start off at #1 on the map of the Crookspur
Fort. Master Kua will be at his desk at #2.
Kua wants you to take out the leader of a Huana tribe that are scuttling
his ships. Accepting the request starts the Tip
of the Spear Quest. Refusing his request leads to being attacked
by Kua and his minions.
You can also avoid paying any price you promised for Handsome
Eliam by suggesting you can pay for Eliam through services instead
of money during this conversation.
Completing the Tip of the Spear
Quest means completing this Quest in a way that favors Furrante's side.
It also means failing the Cruel Cargo
Quest, which would overlap with completing this Quest in a way that
favors Aeldys.
Return to Captain Furrante after completing Tip
of the Spear. He'll reward you with 14,000+ xp, a major gain of
positive reputation with the Principi, and a Fleetbreaker.
Aeldys
Seafol will be your contact at #2 once you arrive at Crookspur.
She'll have a skiff ready and waiting for any slaves you can free from
Crookspur.
Freeing a particular group of Slaves is the objective of Aeldys' side of
this Quest. And it's inconsistent with Furrante's side of this Quest
because freeing any slaves from the Crookspur Slavers will turn the
Slavers hostile against you, and cause the Tip
of the Spear Quest to fail.
Note that wiping out the Slavers will help towards completing the Huana
Quest called Fruitful Alliance
and the Cruel Cargo Quest, but is not
necessary to complete Aeldys' side of this Quest. Freeing a particular
group of slaves from the Dungeon is enough.
If you want to go straightaway to the Crookspur
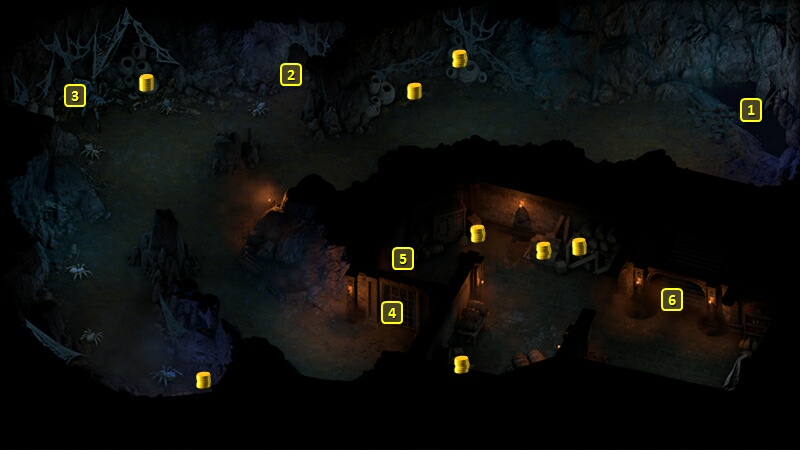
Dungeon first, then go through the tunnel at #4 in Crookspur.
The tunnel itself involves a scripted interaction. Taking the bright
tunnel can lead to the Sea Cave
at #1, although it requires an Athletics check of 10 to do it without
Injury. The darker tunnel allows you to surface and catch a breath of
air, the point of which can reduce the Athletics check for the brighter
tunnel to 8.
There will be a Crystal Spider Queen and a few Crystal Spiders to
fight at #3 of the Sea Cave.
There will be a gate at #4. Your options if you approach the gate from
the south are:
There will be plenty of Ogres and Cutthroats around the Dungeon. The
Wahaki Slaves that you need to rescue to complete Aeldys' side of this
quest will be locked in a cell at #4.
Rescuing the Slaves locked in the cell at #9 helps towards completing
the Huana Quest called Fruitful
Alliance.
If you to sneak the slaves out, a character with good Stealth and
Mechanics (can make a check of at least 12) can sneak past the enemies
to the cell doors and unlock them. The Slaves will make their own way
out. The Wahaki Slaves in particular will be willing to help you kill
any Slavers that remain here in the Dungeon or other parts of Crookspur.
Alternatively, you can just slaughter all the Ogres and Cutthroats here
as well. Taskmaster Grom at #5 will leave behind the Large
Iron Key, which you can then use to open the cell doors if you
can't make the Mechanics skill checks.
This chest at #2 will have a Blackwood
Log in it. Although that is not directly relevant to this Quest,
it can help provide an additional option as you near the end of the
game.
Leave Crookspur by Ship.
You will be once again greeted and surrounded by a Rauatai fleet, this
time commanded by Kana from Pillars of Eternity 1.
Speak to Captain Aeldys again in Fort Deadlight. She will reward you with 21,000+ xp, 2,500cp, a major gain of positive reputation with the Principi, and the Blackblade Hood to conclude the Quest.
If you like, you can speak to Captain Furrante in Dunnage. He'll make it known he's upset with you for upsetting his business arrangement, but it doesn't otherwise affect your status as an ally of the Principi.
Sorcerer's
Place is a project run entirely by fans and for fans. Maintaining
Sorcerer's Place and a stable environment for all our hosted sites requires a substantial amount of our time and funds on a regular basis, so please consider supporting us to keep the site up & running smoothly. Thank you!
Supporting Sorcerer's Place
Has Sorcerer's Place been useful? If you'd like to show your appreciation
for our hard work on the site, and help us pay the bills the site generates
every month, please consider helping support SP.
Thank you!