-

- Forums
- Chatrooms
- Gallery
- Gameplay Videos
- Upload
- Articles
- Mod Reviews
- Shop SP: Games, Movies, Books
|
|
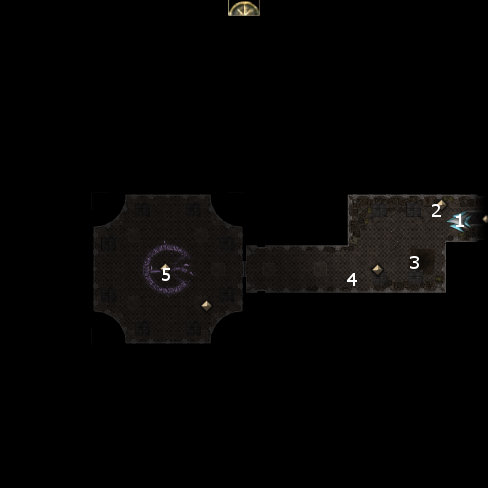
CROSSROAD KEEP BASEMENT
Item Crafting in Crossroad Keep
Now I finally get a chance to do something about all the gems and other materials I've been acquiring. And so this video is a pretty extended sequence in inventory management and item crafting.
I also have some wondrous items to craft as follows:
Next, I use one of the Star Sapphires I purchased from Randolph, plus a Glowing Air Essence, a Weak Power Essence, and a Light spell to raise the enhancement bonus of Bishop's vorpal falchion from +3 to +4. After that, I use a Ruby gem plus a Weak Earth Essence to add the Keen feature to the falchion.
Lastly, I am now able to give the Kossuth's Girdle of Priestly Might and Warding to Qara so that it will become her belt for the rest of the game. It provides her with her deflection bonus to armor class. The Strength bonus may come in handy should she elect to her attack her target with her Vengeance of Asenath spear.
Grobnar's Sorrow
First thing I do when I enter the basement is speak to Grobnar. He wants to talk for a bit about Shandra dying. I deliberately choose the sympathetic response in order to increase my influence with him.
Construct Upgrades
This time I enter the basement with Grobnar as a party member. It is possible to speak to the Construct, and then upgrade it providing you can make some skill checks. The upgrades are supposed to be as follows:
The problem is that the upgrades are bugged, and only provide piddly elemental resistances instead of the intended upgrades. I therefore type in '~' to activate the console, and then enter the following:
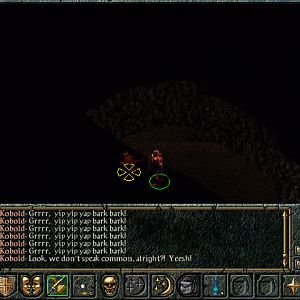
Speaking with Ammon Jerro
I now speak with Ammon Jerro, who's near the Summoning Circle in the basement. He does provide a lot of interesting background information, but he's not willing to offer all of it since I don't have a good enough influence with him just yet.
The point for now is to increase my influence with him, for which there are two opportunities. The first is to indicate the Zhjaeve 'has her uses', which increases my influence with Ammon by +1. I have to take a small Evil hit on my alignment, but I easily make that up later on.
The second opportunity is to get Ammon to admit he could have done more to touch base with Valeria and co-operate with her instead of attacking her at every opportunity. This requires a Diplomacy check against a DC of 25. I make up the difference by having Grobnar activate his Inspire Competence ability.
Gold Filigree Charm
To begin the whole business of summoning Mephasm, all I need to do is step inside the circle. This prompts Ammon Jerro to begin a conversation on how to summon fiends, with Mephasm being the only fiend that he's willing to give instructions regarding. *Note* The conversation is more meaningful if Neeshka is in the party.
The construction of the Gold Filigree Charm necessary to summon Mephasm requires placing a Gold Necklace, a Star Sapphire, a Glowing Fire Essence, and a Faint Power Essence in the Magician's Workbench, and then casting a Darkness spell on the Workbench.
Summoning Mephasm
Now it's a matter of stepping into the circle and calling Mephasm forward. I get 500xp for this. I won't be able to bargain with Mephasm just yet.
Bargaining with Mephasm
Mephasm won't bargain with me until I enter the Circle two more times. There are then three possible bargains I can make with him. Mephasm gives Valeria an Infernal Recipes Book to describe the objects, each of which is called an Infernal Focus, that are needed to complete the bargain and how to make the items.
One Infernal Focus recipe requires casting Darkness on a Magician's Workbench with a Glowing Power Essence, a Ruby, and a Darksteel Ingot in it. I can bargain with Mephasm to get 5,000gp. Apparently this can be done repeatedly as long as I have the materials. I'm already loaded as it is, so I did it just to show how the whole summoning business works.
Another Infernal Focus recipe requires casting Darkness on a Magician's Workbench with a Glowing Fire Essence, a Sapphire, and a Mithral Ingot in it. I can bargain with Mephasm to get one of the following:
The last Infernal Focus requires casting Darkness over a Magician's Bench with a Faint Fire Essence, Faint Power Essence, a Blue Diamond, and an Iron Ingot in it. Bringing the Focus to Mephasm provides the opportunity to trade in another item of your own in return for a Token from Mephasm that will raise one of your attributes (selected when speaking with Mephasm) just by being in your inventory. The additional item you have to give up depends on your class. Arcane spell-casting classes will be required to give up their robes, or whatever they are wearing in the body armor slot of their inventory. Monks will be required to give up their gloves. Any other class will be required to give up their main-hand weapon. If you're not willing to give up your prize armor or weapon, there's a workaround. Equip an item in the appropriate slot that you consider expendable (e.g. Ceremonial Sword for a warrior class), then enter and re-enter the Courtyard about 10 or so times. That item will get flagged as the one to be sacrificed.
*Note* In any event, I don't do this particular bargain because I just don't find any of the Tokens to be worth losing a Blue Diamond over.
Kistrel
Near the summoning circle will be the enormous spider named Kistrel. I deliberately choose the friendly responses that make her feel welcome at Crossroad Keep. This prompts her to begin making a cloak for me, which will take about 20% Keep Time to complete.
Now it is time to manage Crossroad Keep.