-

- Forums
- Chatrooms
- Gallery
- Gameplay Videos
- Upload
- Articles
- Mod Reviews
- Shop SP: Games, Movies, Books

SEAT OF THE MOUNTAIN

Battle Atop the Mountain
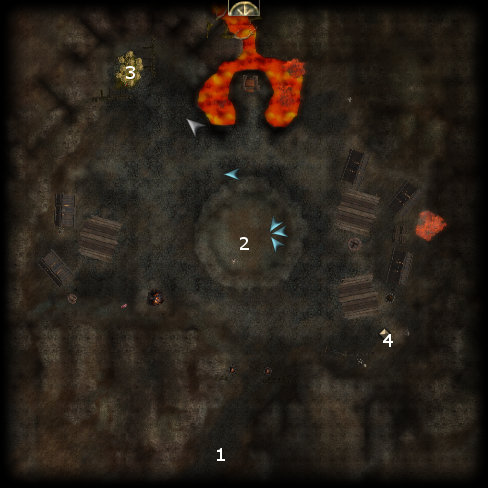
I enter the Seat of the Mountain, and begin a rather tense dialogue with the Fire Giant King. One thing is inevitable, Tholapsyx crashes through to start battle. I side with her for the time being. The Fire Giants aren't difficult, but I make a point of going straight after the Fire Giant King because I want to collect the 403xp for landing the killing blow on him.
Tholapsyx now sets her sights on my party. I could try to make a Diplomacy check of 25 or more to talk her out of it, but I want the 600xp for killing her and the additional 1,000xp quest bonus involved as well.
First, I hold everyone back during the first round. Casavir readies his Divine Shield. Bishop hangs back and fires away with his bow and arrows. Valeria casts an Extended Haste on the part. Zhjaeve casts a Holy Aura on the party. Once those preparations are done, Valeria issues an 'attack nearest' command. She then casts an Extended Greater Invisibility on herself.
Tholapsyx is still very dangerous with her claw and bite attacks, even after her breath weapon is neutralized, and can knock down characters within a certain radius of her. Valeria, Casavir, and Khelgar are the only characters that I want to attack her up close.
Zhjaeve takes the opportunity to tag Tholapsyx with a Harm spell. After that, she does nothing more than to keep her distance and look out for when any one of the front three characters need a Heal spell, or when all three of them need a Mass Heal spell, although it did not come up during this playthrough.
This can be a tough fight, even for experienced players with high-level parties. Part of the problem, as I've previously alluded to, is that Tholapsyx has very fast regeneration. It is entirely possible to bring her to within an inch of her life, and then watch her regain full hit points if the party can't finish her off. It is for that reason that I throw in everything I can, and in this instance manage to bring the dragon down quite quickly.
She leaves behind a Dragon Scale, and two vials of Dragon Blood that can be distilled into Radiant Power Essences.
*Evil* Battle Atop the Mountain
My evil party for this part consists of Zarathos, Bishop, Khelgar, Neeshka, and Ammon Jerro. Just like the good party, I use the Energy Immunity spell on everyone beforehand to protect them from fire damage.
Here I show the easier path to things, which is to simply help the Fire Giants against Tholapsyx. The method itself is simple and effective. Tholapsyx will target the Fire Giant King first and foremost, so Zarathos alternates between attacking the Dragon with his Drone morningstar (aided by an Extended Divine Power spell) and being ready to cast Heal on the Fire Giant King when it's needed. Khelgar whacks away at the Dragon as well. Bishop fires away at the dragon with his Acid Arrows. Neeshka keeps a safe distance. Ammon Jerro constantly hits Tholapsyx with Vitriolic Blast, which is not stopped by Spell Resistance. It is only a matter of time before she gets worn down.
The Fire Giant King naturally turns on me afterwards, so I'm forced to deal with him as well. Neeshka protects herself with Displacement, and Ammon Jerro does likewise with Retributive Invisibility. Bishop switches back to his Falchion. It then becomes a matter of simply wiping out the Fire Giants in melee combat.
Belt of Ironfist
I then loot the Fire Giant King's dead body, as well as the rest of the corpses. One of the items he leaves behind is Terrance's Fell Axe (Battle Axe +4, +2 Strength, +1d4 massive criticals). The other item is the Belt of Ironfist, which by itself provides the following benefits:
Fire Giant King's Treasure
I return to the Seat of the Mountain. There will be a treasure hoard to the left of the Fire Giant's Throne. Most of the containers have random loot. The large locked chest at the back will have some random items plus:
The chest just to the left can yield a high value gem. I milk it for a Beljuril, which I'll use to craft a Headband of Intellect +8 for Sand.
Caelryna Seerar
On the right side of the Seat will be a palisade with a Drow prisoner inside it, Caelryna Seerar. I agree to free her, and tell her to set up shop at Crossroad Keep.
She will be in the same shop as Deekin. She sells some crafting components, as well as various goods of a darker or relatively more evil nature. I bought the following from her:
Hammer of Ironfist
Now I return to the Ironfist Stronghold and speak with Keros again. To make it short, Khelgar is able to lift the Hammer of Ironfist while wearing the Belt and Gauntlets of Ironfist as well. I get 1,000xp for securing the allegiance of the Ironfist Clan.
The Hammer itself has the following properties:
Instead, I have Casavir use his Use Magic Device skill to equip all three of the Belt, Gauntlets and Hammer of Ironfist. The Hammer itself confers numerous welcome benefits, like a +6 Strength bonus, bonus electrical damage, and a chance of knocking down its target on contact. The Call Lightning power also gives Casavir an alternative power to call on if he wants to damage and stun his targets at once, although opporunities to do this are rare since it will harm party members as well. Casavir, even more so than Khelgar, is well-suited to wielding the Hammer since he can use the Holy Sword spell to add +2d6 damage vs. evil to the Hammer for 14 rounds (at least after he gets the Practiced Spellcaster feat).
*Evil* Hammer of Ironfist
The parallel video for the evil playthrough, which plays out different and shorter to reflect the fact that I left Khelgar as a Fighter instead of turning him into a Monk.
Now I make a return to the Fiery Canyon.


